KB Article #177014
Setting up SuSE Linux Enterprise High Availability cluster with ocfs2
Below are listed the steps needed to be performed to configure OCFS2 cluster using SLES11 SP3 HAE on Axway appliances
For SecureTransport 5.5 Virtual Appliance use KB181989 to setup iSCSI first. Then use ST documentation SecureTransport 5.5 ApplianceGuide to setup SLEHA cluster.
IMPORTANT: Listed below 10.232.10.21 (avernus) and 10.232.10.20 (ygg) are IP addresses (hostnames respectivelly ) of SLEHA nodes used in the case study. Same goes for m5810-248 and m5810-249 hostnames. The values should be substituted with actual ones for the environment in question
Contents :
1. Setup SLES HA with ocfs2 using multicast on the first node
2. Setup N-th node in the cluster using multicast
3. Setting up SLEHA cluster to use unicast
4. Verifications
5. Procedure to remove a node from SLEHA cluster
6. Testing STONITH configuration
7. Useful references and links
1) Setup SLES HA with ocfs2 using multicast on the first node:
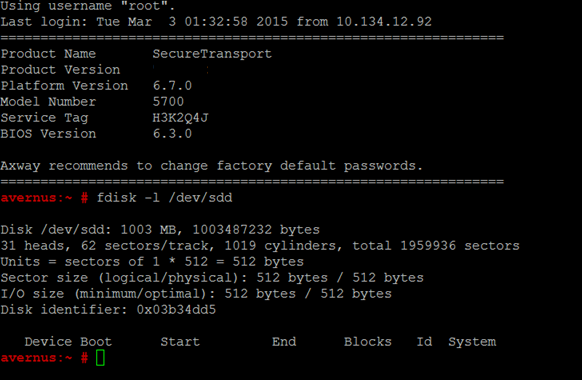
- Verify with fdisk that SAN is visible:
fdisk -l /dev/sdd
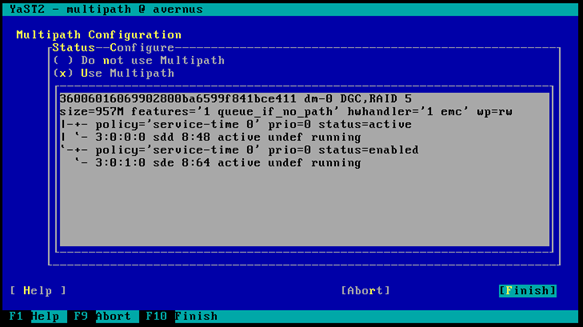
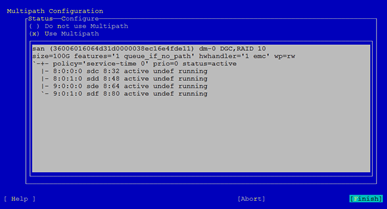
- Run “yast multipath" to enable Multipath :
select (*) Use Multipath to enable it
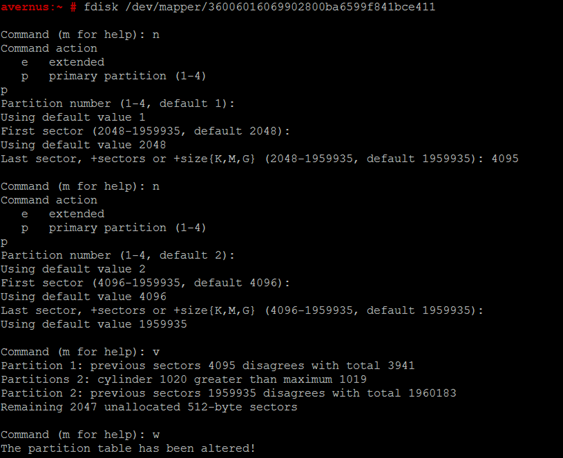
- Using fdisk, partition the SAN. Create 2 primary partitions. First for STONITH and second for data. Use the device as listed under under /dev/mapper/
- Verify that both partitions on the SAN exist as devices with the “dm-name" prefix under “/dev/disk/by-id". Reboot the appliance if either is missing.
IMPORTANT: Make a note of the devices names under “/dev/disk/by-id" starting with dm-name-*
In the case study, the device names are:
ll /dev/disk/by-id/dm-name-36006016069902800ba6599f841bce411*
lrwxrwxrwx 1 root root 10 Apr 9 03:59 /dev/disk/by-id/dm-name-36006016069902800ba6599f841bce411 -> ../../dm-0
lrwxrwxrwx 1 root root 10 Apr 12 20:47 /dev/disk/by-id/dm-name-36006016069902800ba6599f841bce411_part1 -> ../../dm-1
lrwxrwxrwx 1 root root 10 Apr 9 03:59 /dev/disk/by-id/dm-name-36006016069902800ba6599f841bce411_part2 -> ../../dm-2
Those would be used in the steps described below ( make sure to substitute with correct ones for the environment in question when following the steps ).
- Prepare the STONITH device
# /usr/sbin/sbd -d /dev/disk/by-id/dm-name-36006016069902800ba6599f841bce411_part1 -4 180 -1 90 create
- Run “yast ntp-client" to configure NTP and set ntpd daemon to auto start.
- Run the SLES High Availability cluster configuration. Configure it to run at boot. Use the IP address of the server (no second NIC) and ignore the multicast address and port. Configure the STONITH device.
# sleha-init
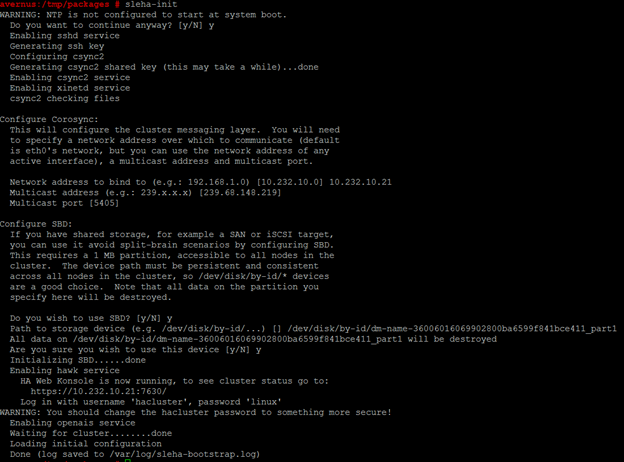
IP address is eth0 one if only one NIC is used. If there are 2 – use eth1 for the pacemaker
- Run “crm configure" and add the dlm and o2cb primitives. Commit the changes:
#crm configure
primitive dlm ocf:pacemaker:controld \
    op start timeout="180" interval="0" \
    op stop timeout="100" interval="0" \
    op monitor interval="120" timeout="60"
primitive o2cb ocf:ocfs2:o2cb \
    op start timeout="180" interval="0" \
    op stop timeout="100" interval="0" \
    op monitor interval="120" timeout="60"
#commit
- Configure the base group and the clone group. Commit the changes :
group base-group dlm o2cb
clone base-clone base-group \
meta interleave="true"
#commit
- Edit the STONITH from the crm configuration
edit stonith-sbd
- In “vi" mode replace everything with:
primitive stonith-sbd stonith:external/sbd \
params sbd_device="/dev/disk/by-id/dm-name-36006016069902800ba6599f841bce411_part1" \
meta target-role="Started" \
op monitor interval="20" timeout="20" start-delay="20"
IMPORTANT: dm-name-36006016069902800ba6599f841bce411_part1 is the STONITH device name in the case study. It should be substituted with actual one for the environment in question
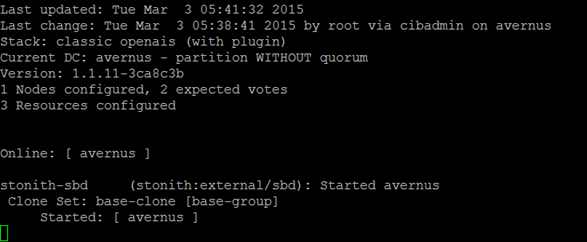
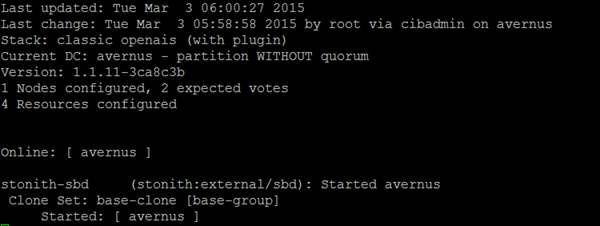
- Verify the cluster is running normally with “crm_mon":
#crm_mon
Use Ctrl +C to exit crm_mon
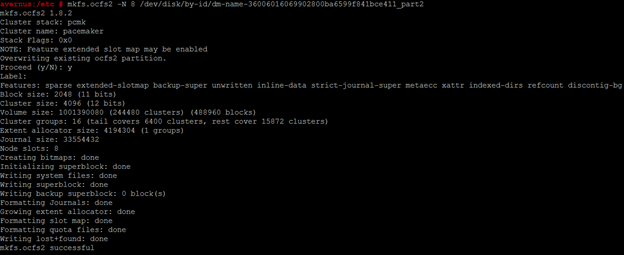
- Create the ocfs2 filesystem on the data partition. Use smaller number of nodes on small drives:
# mkfs.ocfs2 -N 8 /dev/disk/by-id/dm-name-36006016069902800ba6599f841bce411_part2
IMPORTANT: /dev/disk/by-id/dm-name-36006016069902800ba6599f841bce411_part2 is the data device name in the case study. It should be substituted with actual one for the environment in question
- Create the SAN mount point
# mkdir /sanmount
- Run “crm configure" again to mount the drive. Add the following primitive. Commit the change:
#crm configure
primitive ocfs2-1 ocf:heartbeat:Filesystem \
    params device="/dev/disk/by-id/dm-name-36006016069902800ba6599f841bce411_part2" directory="/sanmount" fstype="ocfs2" options="acl" \
    op start timeout="180" interval="0" \
    op stop timeout="60" interval="0" \
    op monitor interval="120" timeout="60" \
    meta target-role="Started"
#commit
IMPORTANT: /dev/disk/by-id/dm-name-36006016069902800ba6599f841bce411_part2 is the data device name in the case study. It should be substituted with actual one for the environment in question. Same goes for the mount point directory value: /sanmount has been used in the case study and it should be substituted with the actual one for the environment in question.
- Edit the base group from the crm configuration:
edit base-group
In “vi" mode append “ocfs2-1". Commit the changes:
group base-group dlm o2cb ocfs2-1
#commit
- Restart the HA cluster
# /etc/init.d/openais restart
- Verify the cluster is running normally with “crm_mon":
#crm_mon
- Verify that SAN has been correctly mounted :
2) Setup N-th node in the cluster using multicast:
Login using root user on shell or console
- Run
#yast2 multipath
to configure multipath. Switch option from [Do not use Multipath] to [Use Multipath]. and list of paths to devices should appear.Using default configuration is sufficient. Advanced configuration is available by selecting [Configure] option. Select Finish when done.
WARN: If there's an alias setup for multipath, the same configuration needs to be applied on the node as well as restart multipath daemon, after the configuration has been done . Verify that device name is the same on all nodes.
- Run
#chkconfig --add multipathd
so that multipath will auto-start when booting.
- Run
#yast ntp-client
to configure NTP and set ntpd daemon to auto start.
- Run
#yast lan
to configure eth1 NIC for pacemaker (eth0 if there is only one interface).
- Run
#fdisk -l
to verify the device names are matching on all other nodes in the cluster.
- Run
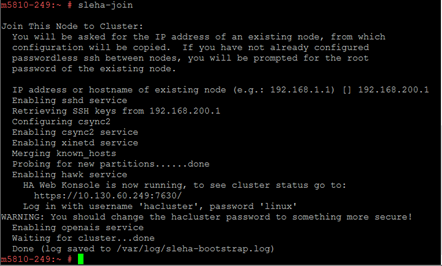
#sleha-join
and answer the questions. If ssh server is running with a non-standard port on the first node (10022 as default on appliances), please update the /etc/ssh/ssh_config and add Port <number> entry.
sleha-join relies on scp and ssh to copy configuration from the first node.
- Run
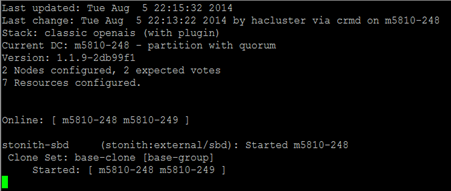
#crm_mon
again to verify cluster status. There should not be any errors. If there's an error, restart the cluster service again by running
#/etc/init.d/openais restart
When all cluster resources are started correctly, crm_mon does not show any error.
3) Setting up SLEHA cluster to use unicast
Follow the steps above to have the cluster running.
If your enviroment does not use multicast, change the configuration from multicast to unicast on each of the cluster nodes following the steps as described below:
- Stop SLEHA cluster via running
#/etc/init.d/openais stop
- Run
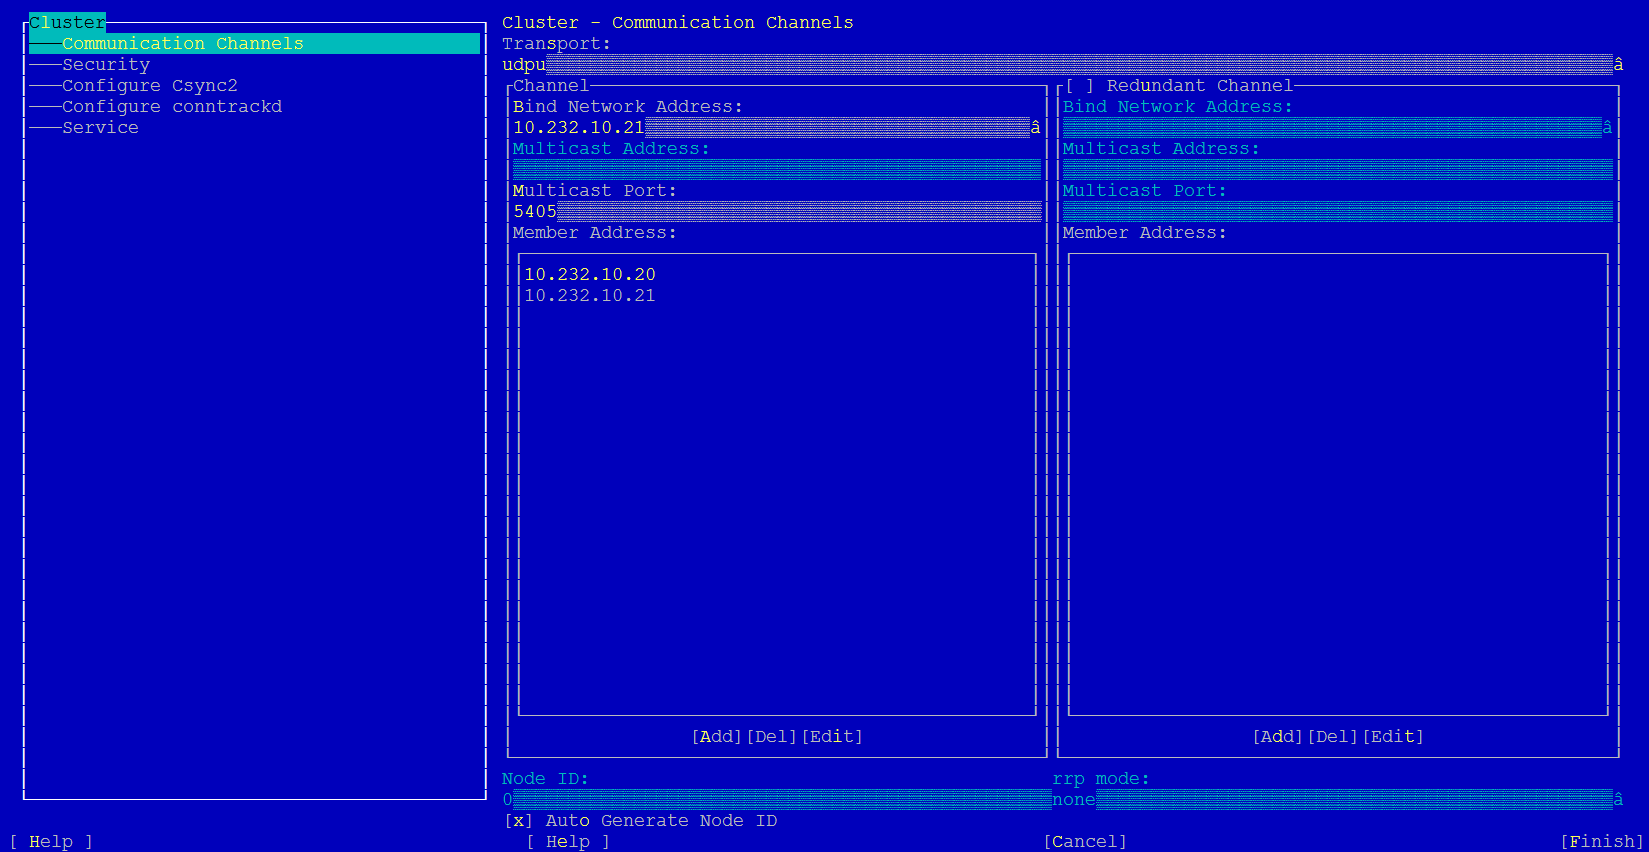
#yast2 cluster to display the SLEHA cluster configuration .
- Edit [Cluster] --> [Communication Channels] --> [Transport] from udp to udpu
Add all cluster nodes IP addresses under [Cluster] --> [Communication Channels] -->[Member Address]
Use (x) [Auto Generate Node ID]
IMPORTANT: 10.232.10.21 (avernus) and 10.232.10.20 (ygg) are IP addresses (and hostnames) of SLEHA nodes used in the case study. Same goes for m5810-248 and m5810-249 hostnames. The values should be substituted with actual ones for the environment in question.
Start SLEHA cluster on first node:
#/etc/init.d/openais start
Start SLEHA cluster on each of the remaining nodes:
#/etc/init.d/openais start
When all cluster resources are started correctly, crm_mon does not show any error.
4) Verifications
To view the cluster resource configuration, run:
#crm configure show
primitive dlm ocf:pacemaker:controld \
    op monitor interval="60" timeout="60"
primitive o2cb ocf:ocfs2:o2cb \
     op monitor interval="60" timeout="60"
primitive ocfs2-1 ocf:heartbeat:Filesystem \
     params device="/dev/disk/by-id/dm-name-36006016069902800ba6599f841bce411_part2" directory="/mnt/ocfs2" fstype="ocfs2" options="acl" \
     op monitor interval="20" timeout="40"
primitive stonith-sbd stonith:external/sbd \
     params sbd_device="/dev/disk/by-id/dm-name-36006016069902800ba6599f841bce411_part1" \
     meta target-role="Started" \
     op monitor interval="20" timeout="20" start-delay="20"
group base-group dlm o2cb ocfs2-1
clone base-clone base-group \
     meta interleave="true"
property $id="cib-bootstrap-options" \
     stonith-enabled="true" \
     no-quorum-policy="ignore" \
     placement-strategy="balanced" \
     dc-version="1.1.9-2db99f1" \
     cluster-infrastructure="classic openais (with plugin)" \
     expected-quorum-votes="2"
rsc_defaults $id="rsc-options" \
     resource-stickiness="1" \
     migration-threshold="3"
op_defaults $id="op-options" \
     timeout="600" \
     record-pending="true"
For each node, there should be a stonith external/sbd resource created.
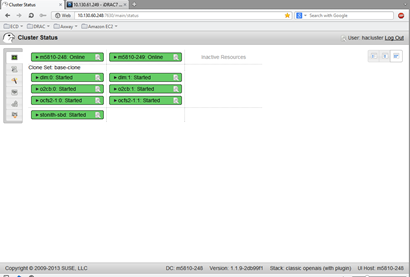
Also there is a HA Web Console for status view and configuration, running on port 7630 on each of the cluster nodes. Username: hacluster password: linux
5) Procedure to remove a node from SLEHA cluster
Login as root user to any cluster node, except the one that would be removed. Run command:
sleha-remove -c <hostname> or <IP address> of the node to be removed.
6) Testing STONITH configuration
From shell, run command:
#crm node fence <node hostname>
and it will fence the node and causing a reboot.
7) Useful references and links:
https://www.suse.com/documentation/sle_ha/singlehtml/book_sleha/book_sleha.html
https://www.suse.com/documentation/sle_ha/book_sleha/data/sec_ha_installation_setup_manual.html
https://forums.suse.com/archive/index.php/t-2124.html
