KB Article #181989
APPLIANCE: Setup iSCSI on SecureTransport 5.5 Virtual Appliance for SLEHA cluster
How to setup iSCSI on SecureTransport 5.5 Virtual Appliance
A SLEHA cluster requires shared access to SAN disks exposed as LUN block devices. Originally on a physical (hardware) appliance dedicated fiber SAN cards were used for shared access to SAN storage. In a virtual appliance this can be achieved by iSCSI interface.
This article aims to help seting up iSCSI Initiators and iSCSI Target ready for SLEHA cluster setup:
A physical or virtual appliance with SAN storage attached will be configured as iSCSI Target. Two virtual appliances will be configured as iSCSI Initiators which will connect to the iSCSI Target.
The setup is applicable to SLES12 SP5 used in SecureTransport 5.5 Virtual Appliances. The iSCSI Target will be setup with no authentication and with dynamic ACLs.
For older appliances with SLES11 a similar setup is still applicable without need to use targetcli, because authentication is not used by default and Yast is enough to do the configuration of the iSCSI Target.
1. Install SLEHA and iSCSI packages on SuSE from Axway repository.
Update SuSE first. Reboot if needed.
zypper up
Install or update SLEHA packages.
zypper in -t pattern ha_sles
zypper in yast2-multipath
zypper in python3-parallax python3-lxml
Install or update iSCSI packages.
zypper in lio-utils python-configshell-fb python-curses python-pyparsing python-pyudev python-rtslib-fb python-urwid targetcli-fb yast2-iscsi-lio-server
2. Setup iSCSI Target
2.1. Find the right block device and create partition on it
The device is sde in our case.
ls -l /dev/disk/by-id

Create a partition. Run
fdisk /dev/sde
and then use these keys to select the options
n
p
1
Enter
Enter
w

Verify the partition.
fdisk -l /dev/sde

2.2. Add block device with targetcli
Check that you start with empty configuration.
targetcli
ls
exit

If the configuration is not empty and you do not need something that is already there you can clean it up with
targetcli clearconfig confirm=True
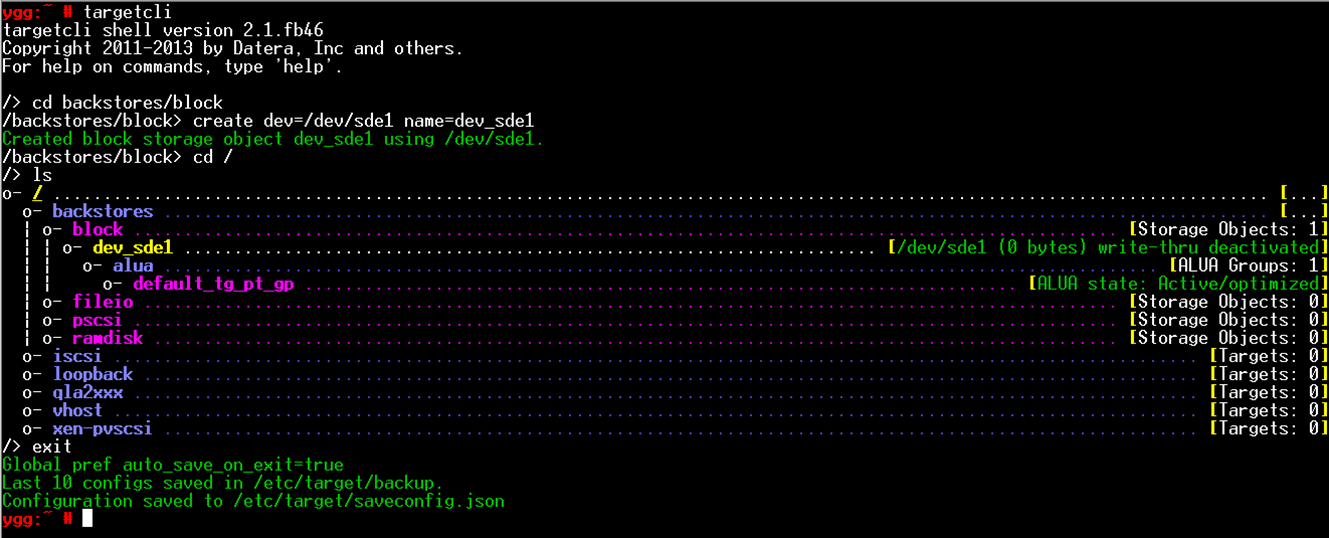
Configure block device /dev/sde1.
targetcli
cd backstores/block
create dev=/dev/sde1 name=dev_sde1
cd /
ls
exit
2.3. Configure iSCSI Target with Yast
yast2
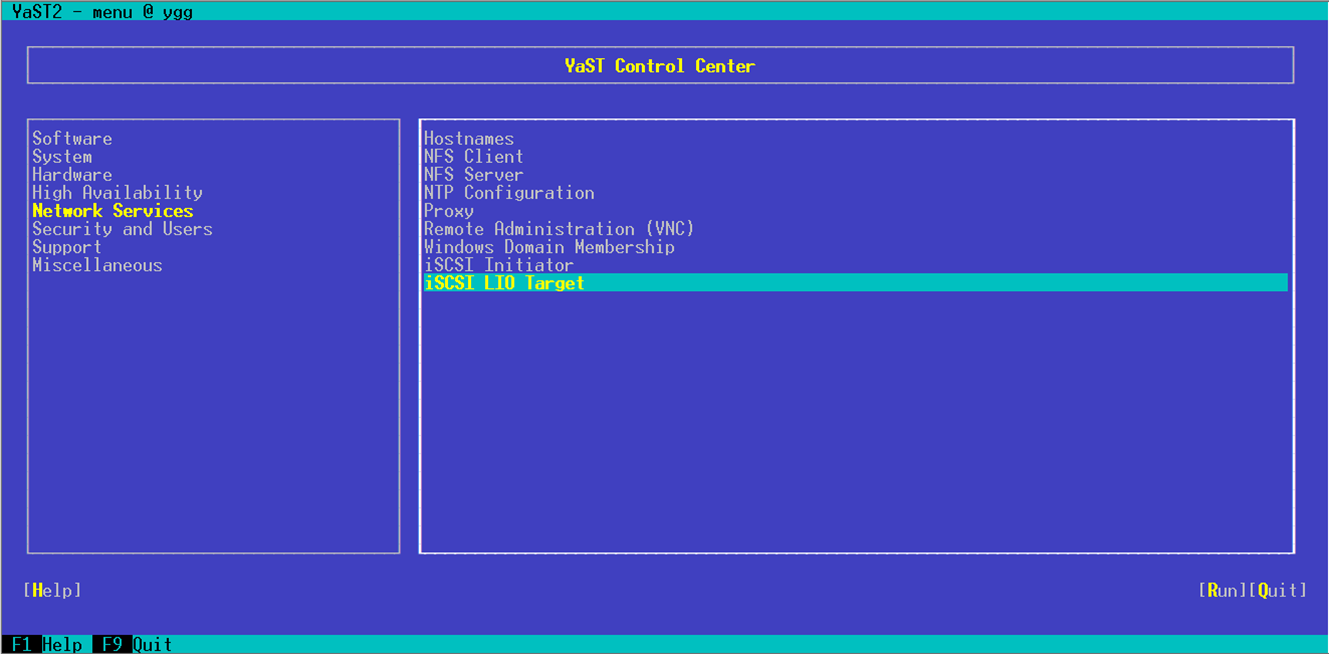
Go to Network Services and select iSCSI LIO Target.
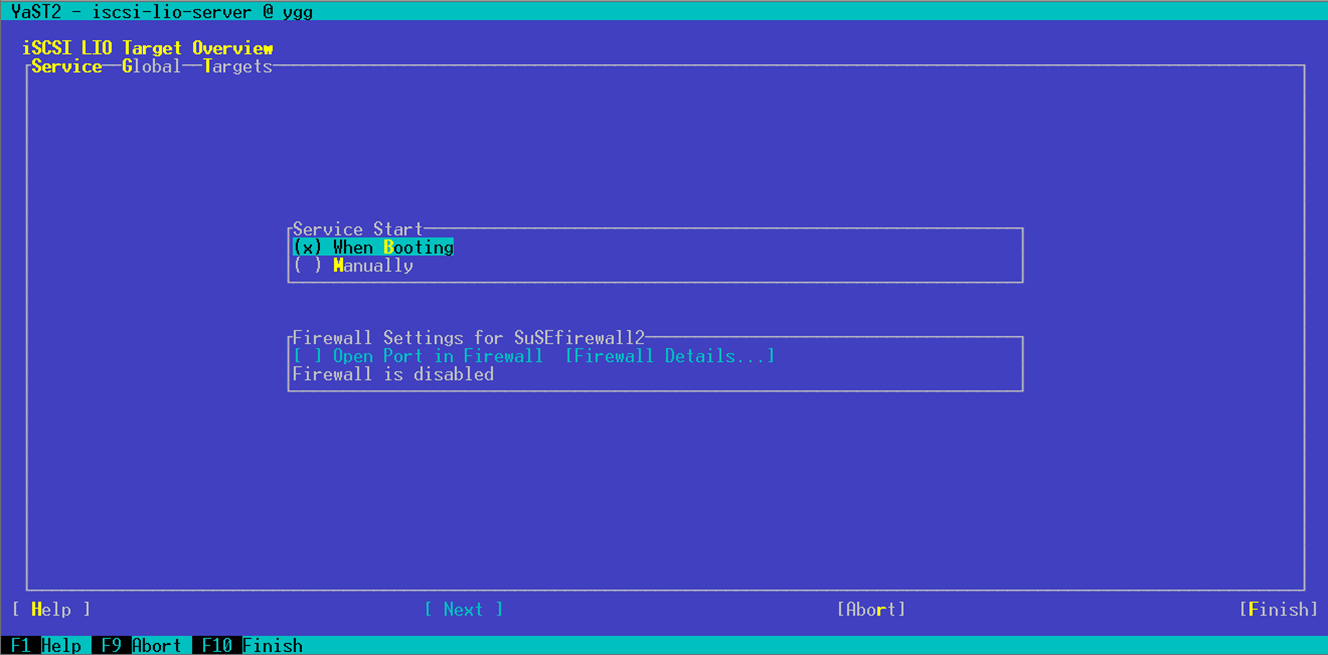
Select Service Start → When Booting.
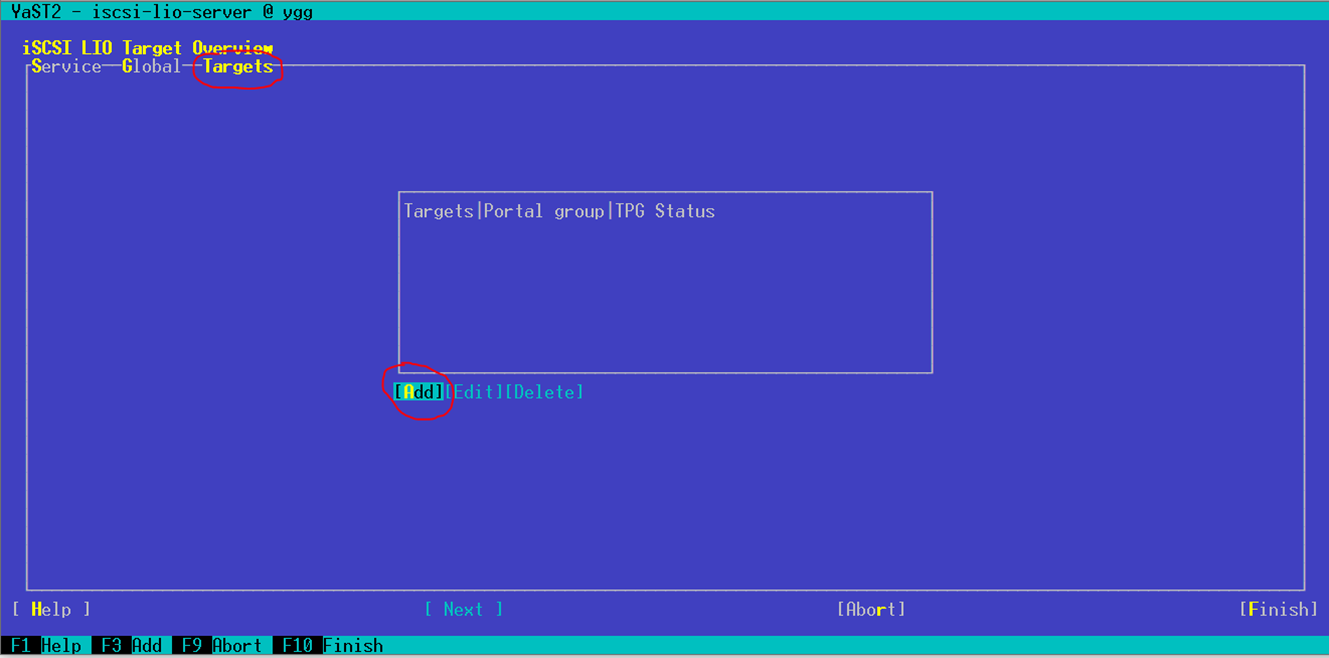
Go to Targets → Add.
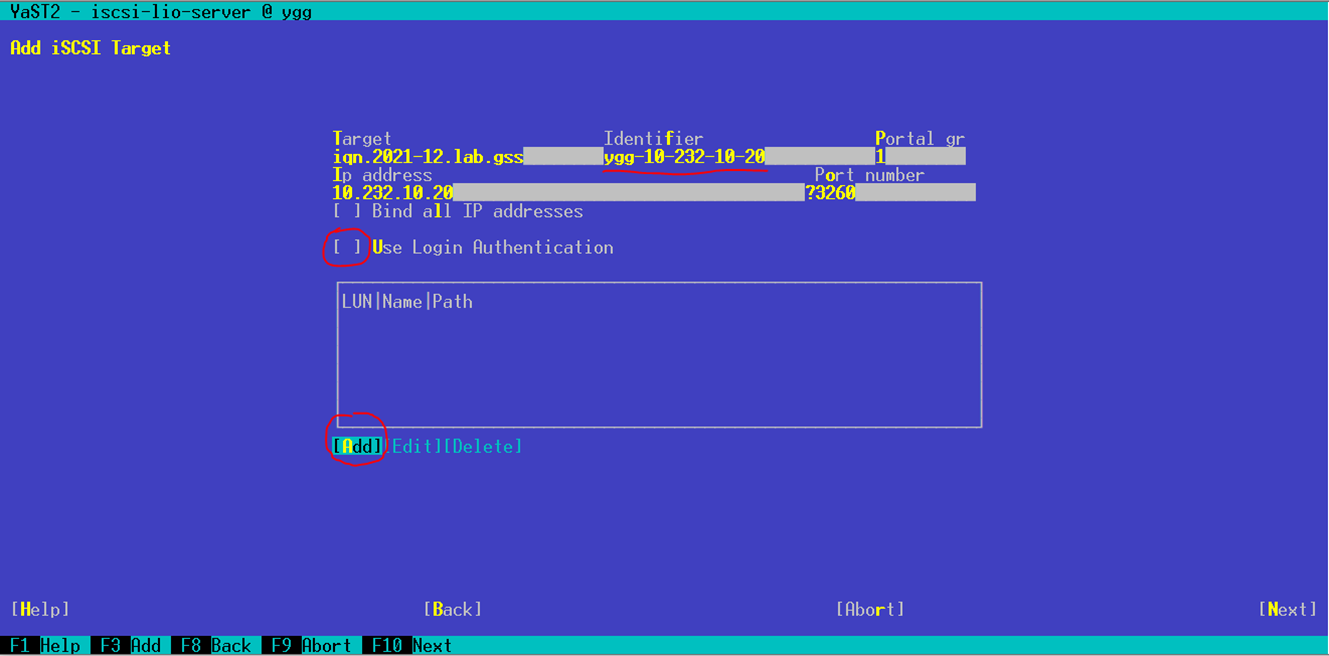
Uncheck Use Login Authentication. You can edit the Identifier if you would like or use the one generated by YasT. The example here was modified to the hostname and IP of the machine. Select Add (LUN).
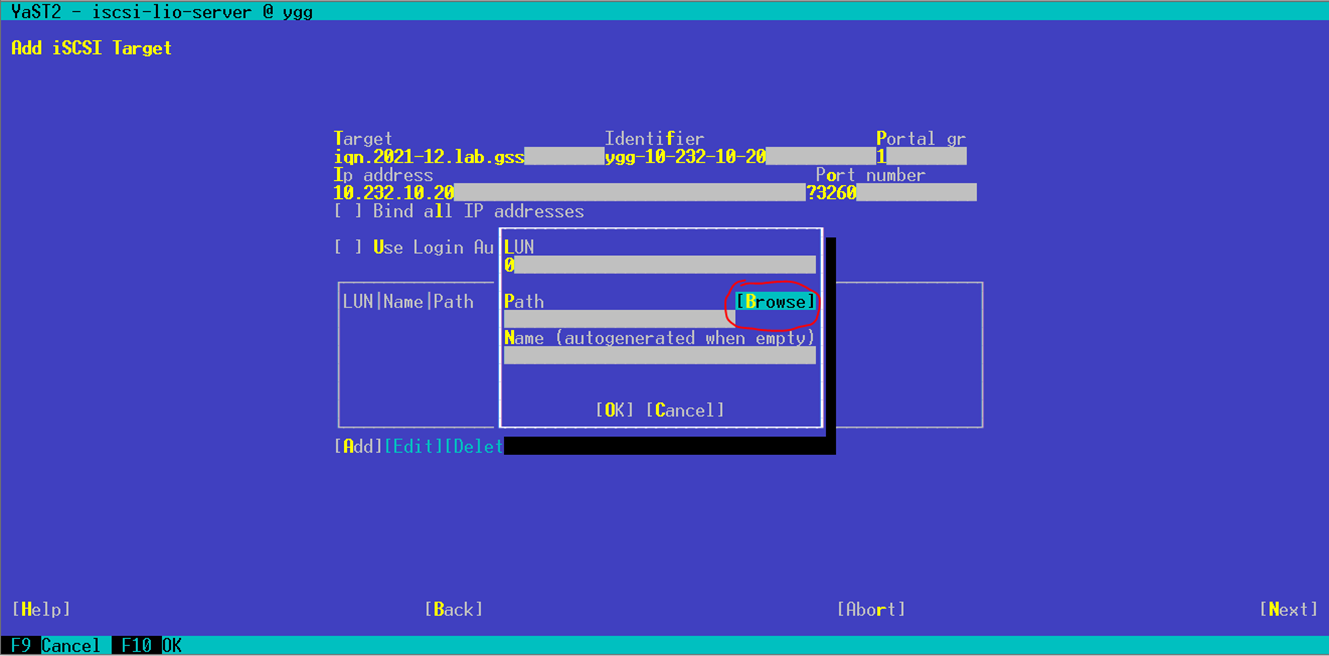
Go to Browse.
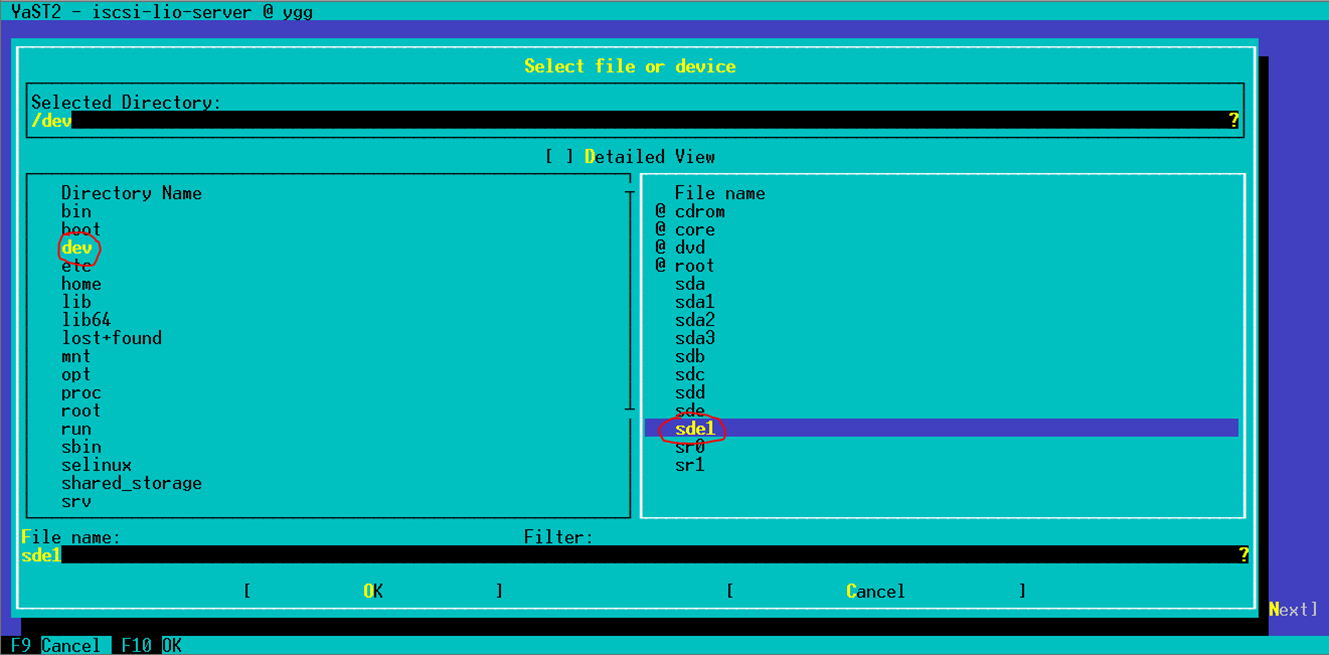
Select dev and then sde1.
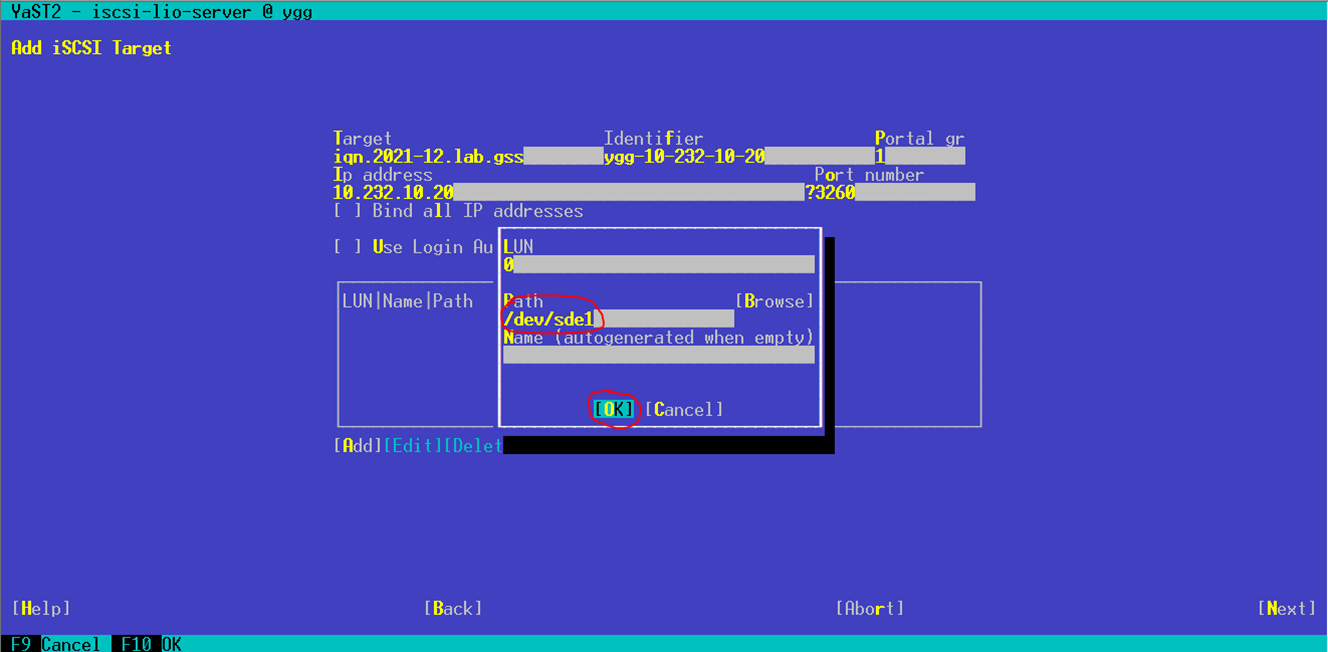
Confirm with OK.
Go to Next.
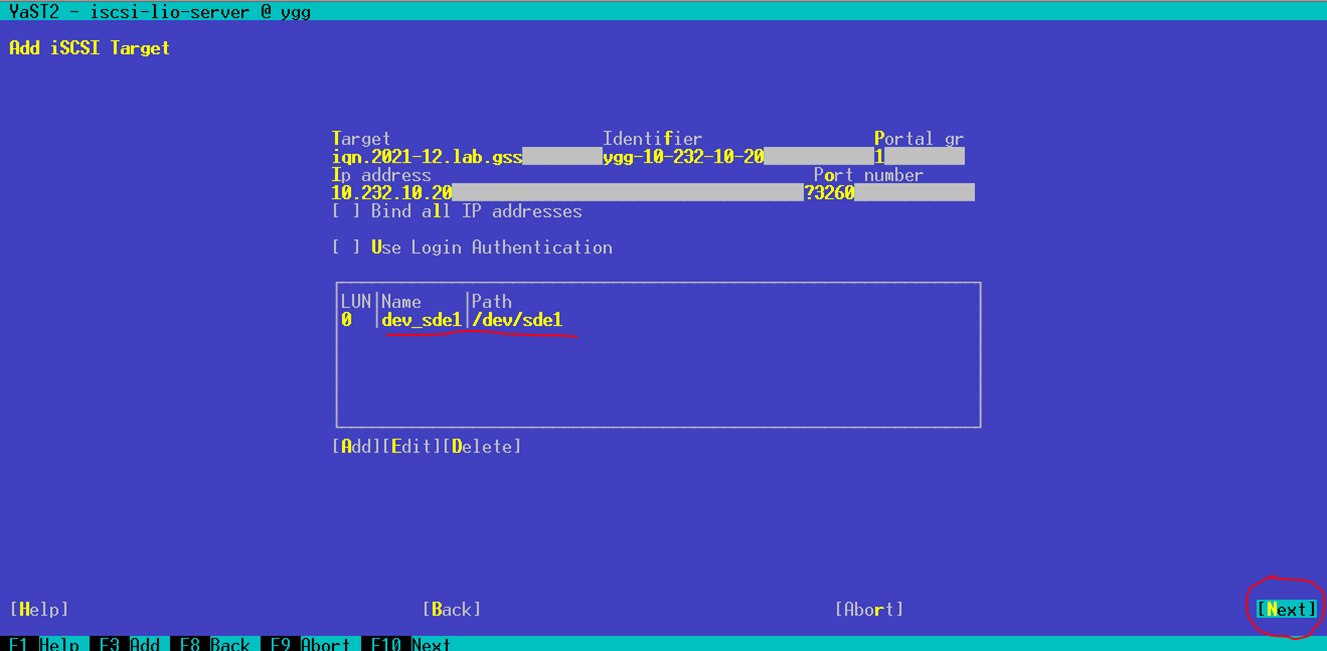
Go to Next. We will not add Initiators here because we will not use authentication.
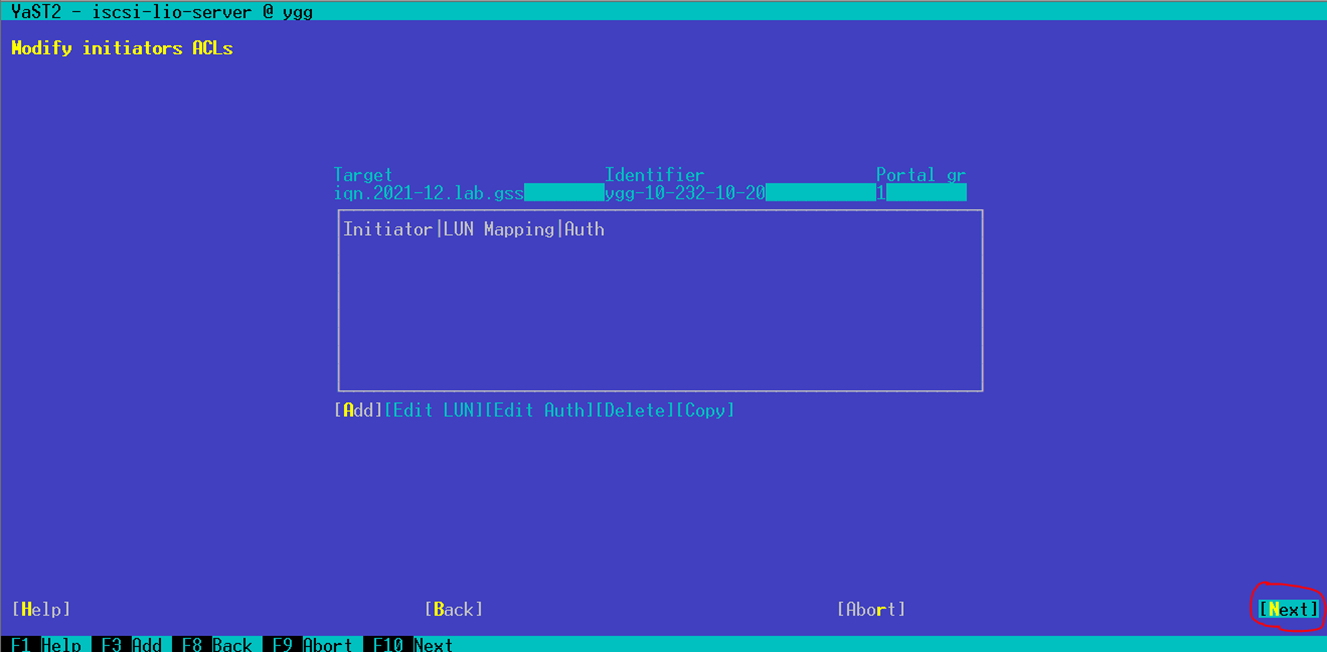
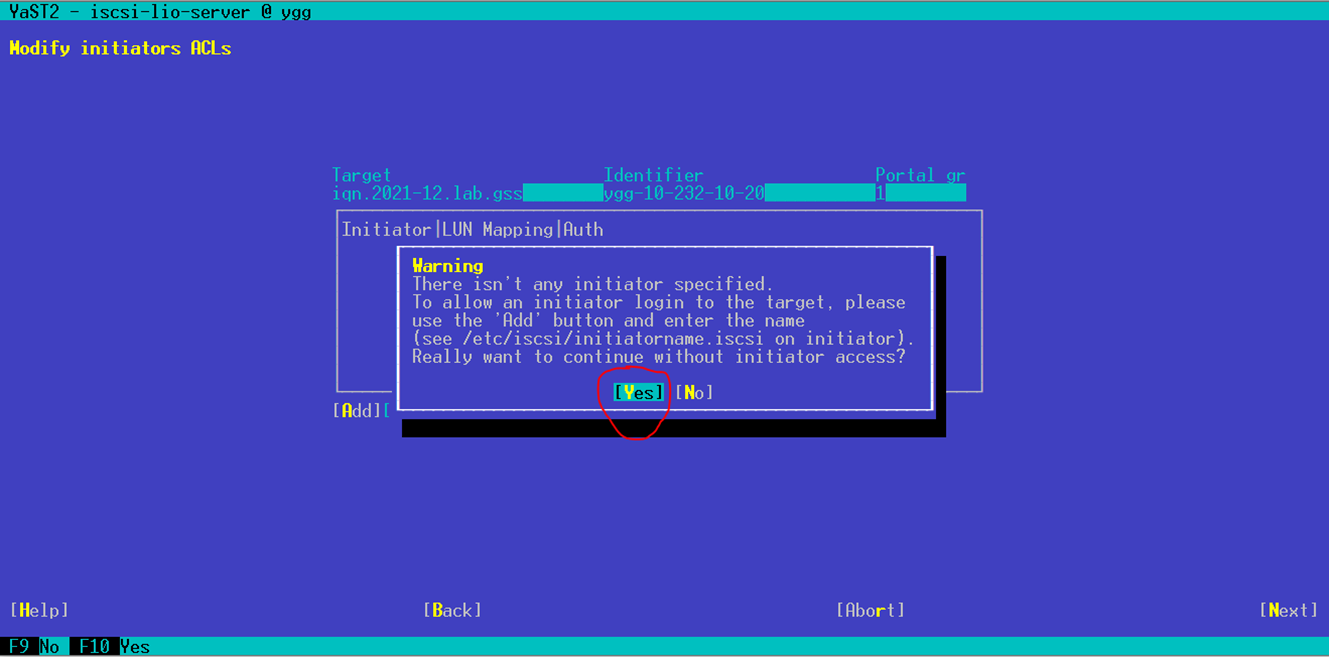
Dismiss the warning with Yes.
Go to Finish.
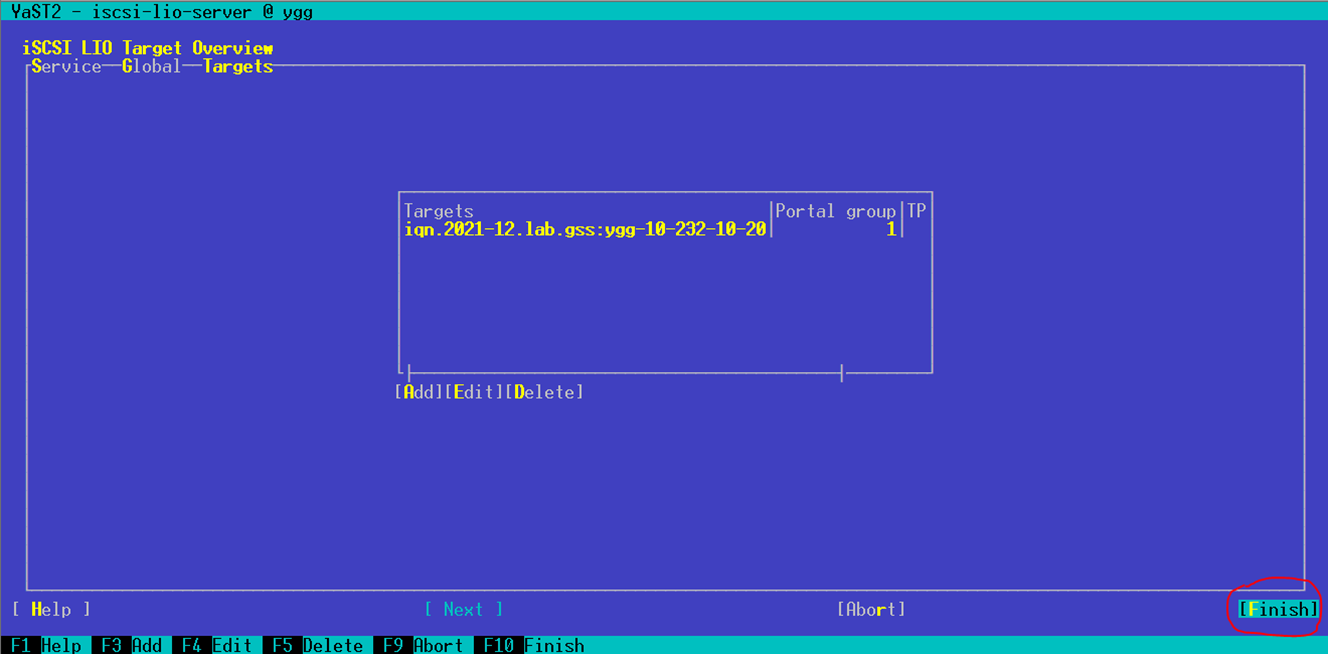
Exit Yast
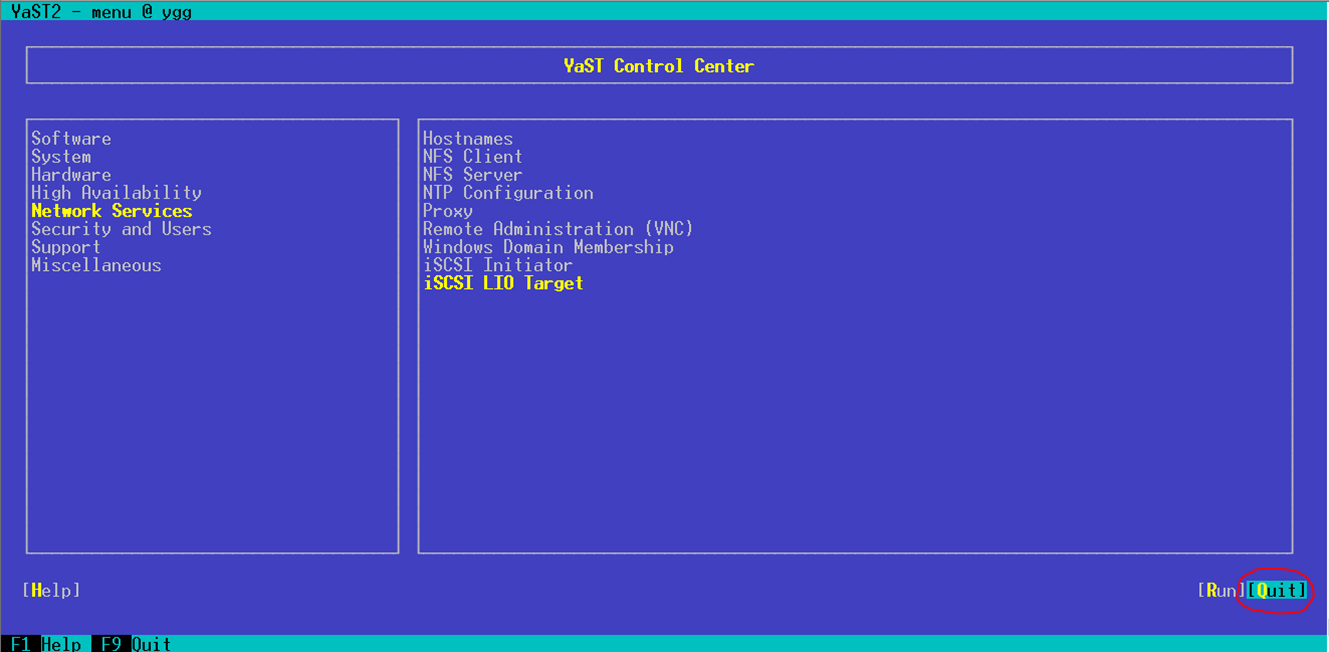
2.4. Set attributes on tpg1 with targetcli
targetcli
cd /iscsi/iqn.<your iqn1>/tpg1/
set attribute authentication=0
set attribute demo_mode_write_protect=0
set attribute generate_node_acls=1
set attribute cache_dynamic_acls=1
cd /
exit

Verify that all was set correctly with running targetcli again.
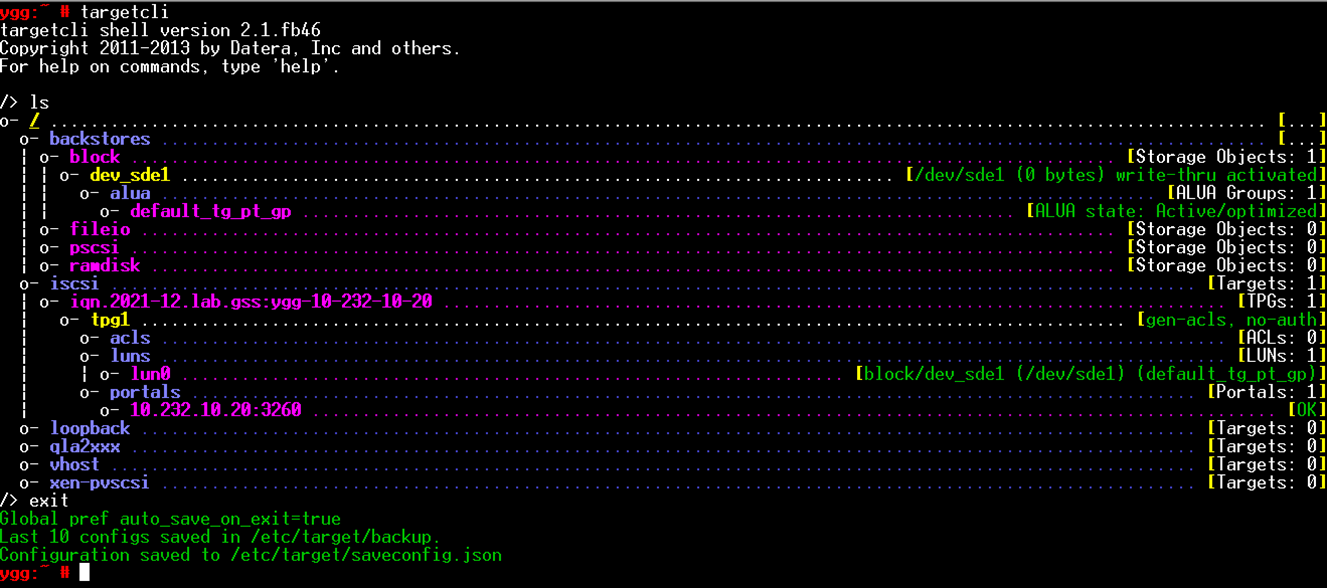
2.5. Configure SuSE services
systemctl enable iscsid
systemctl start iscsid
systemctl enable target
systemctl start target
systemctl enable targetcli
systemctl start targetcli
2.6. Reboot the server to verify that the configuration will be preserved upon restart
Check with targetcli that configuration looks the same as on the last screenshot above.
3. Setup iSCSI Initiators
The instructions here are the same for the two virtual appliances which will act as iSCSI Initiator.
3.1. Configure iSCSI Initiator with Yast
yast2
Go to Network Services and select iSCSI Initiator.
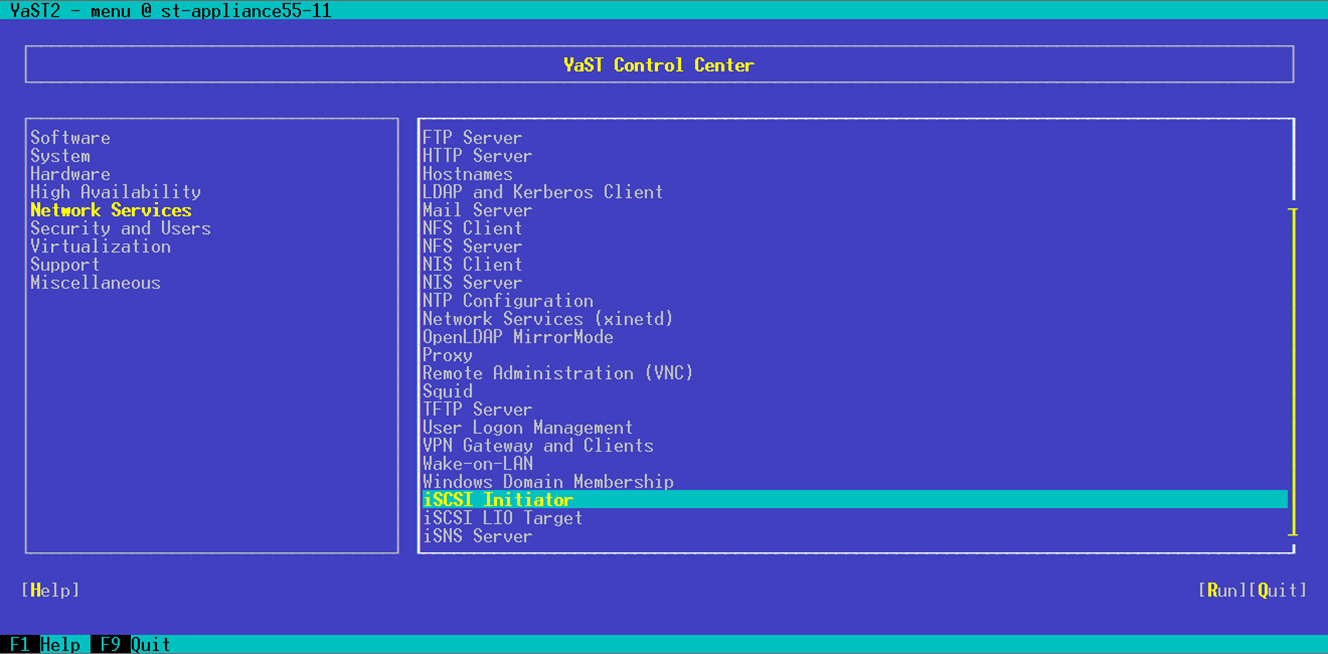
Select Service Start → When Booting.
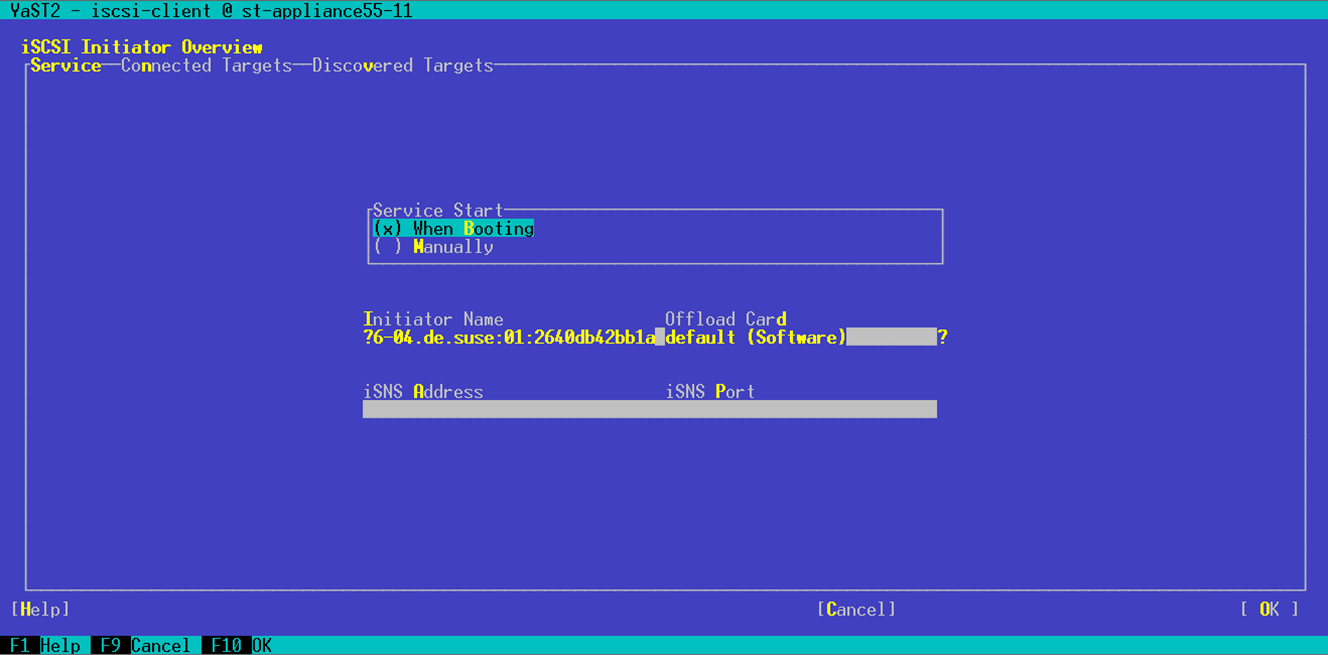
Go to Connected Targets → Add.
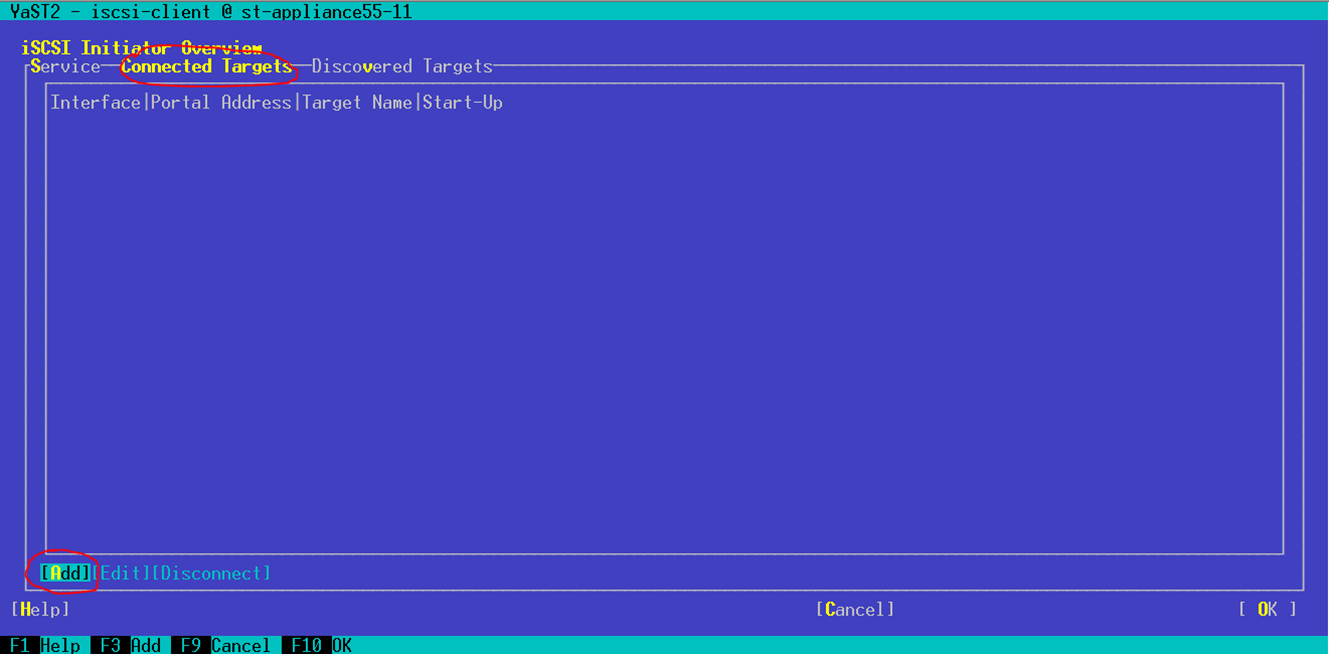
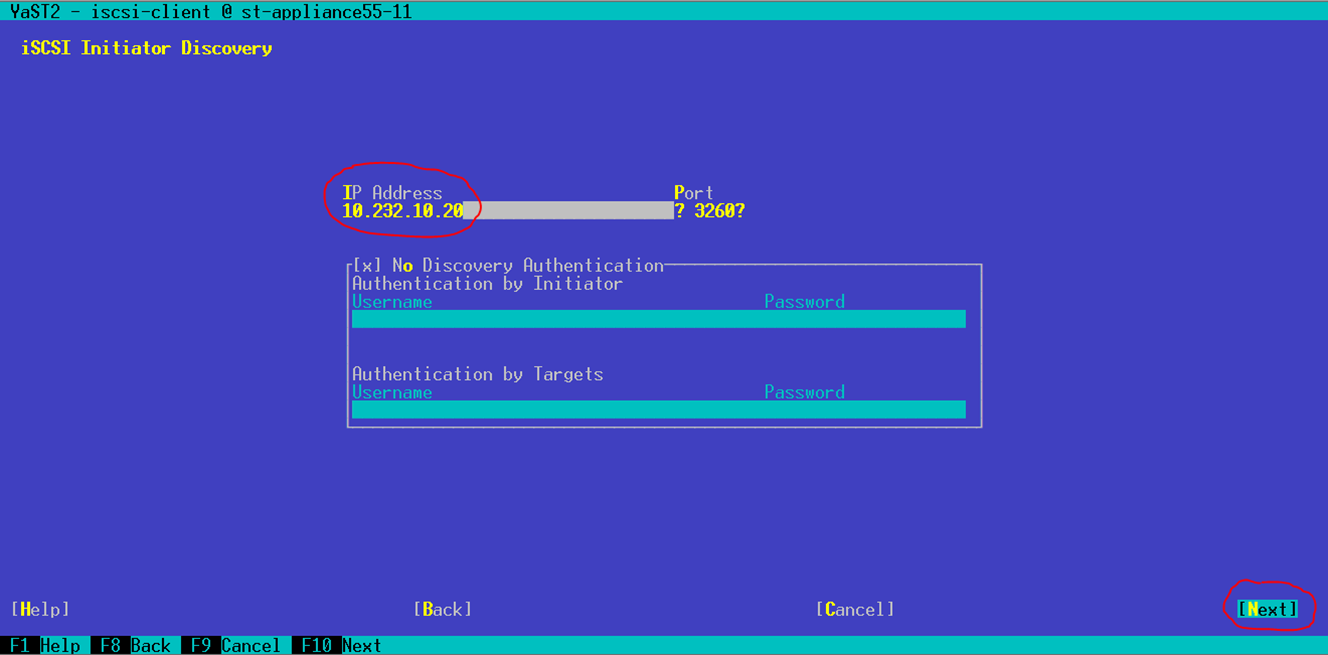
Enter the IP address of the iSCSI Target server configured in step 2 above. Go to Next.
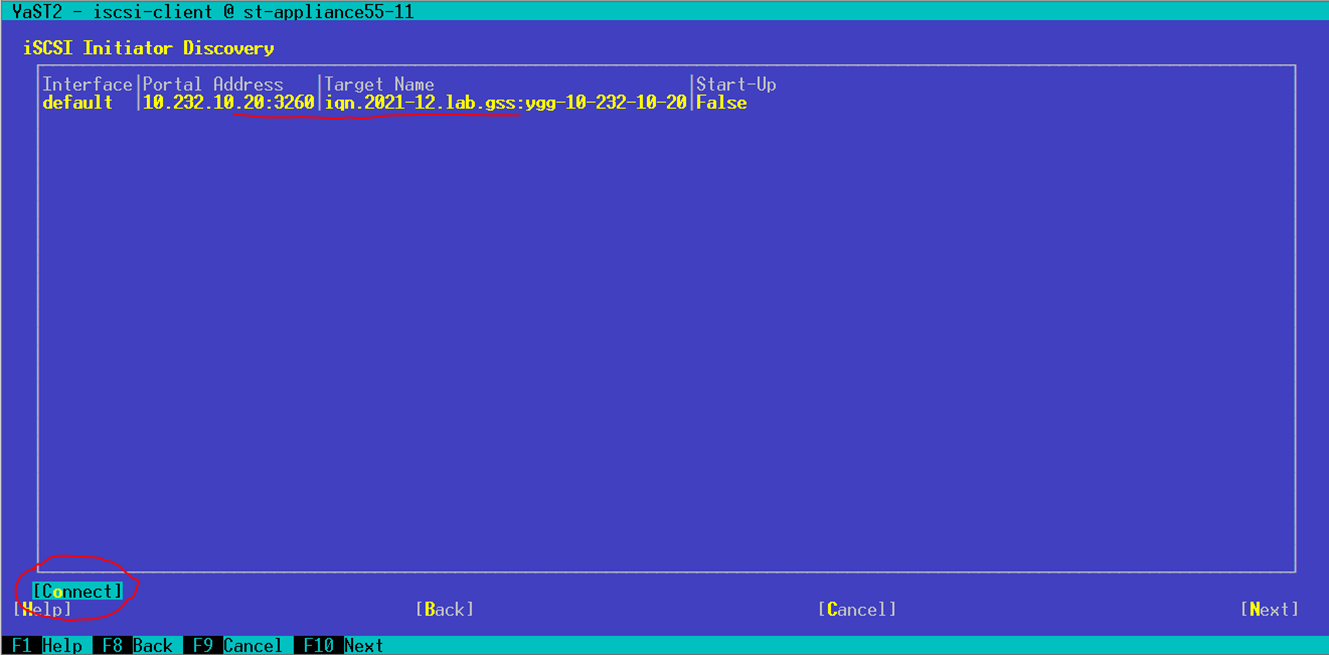
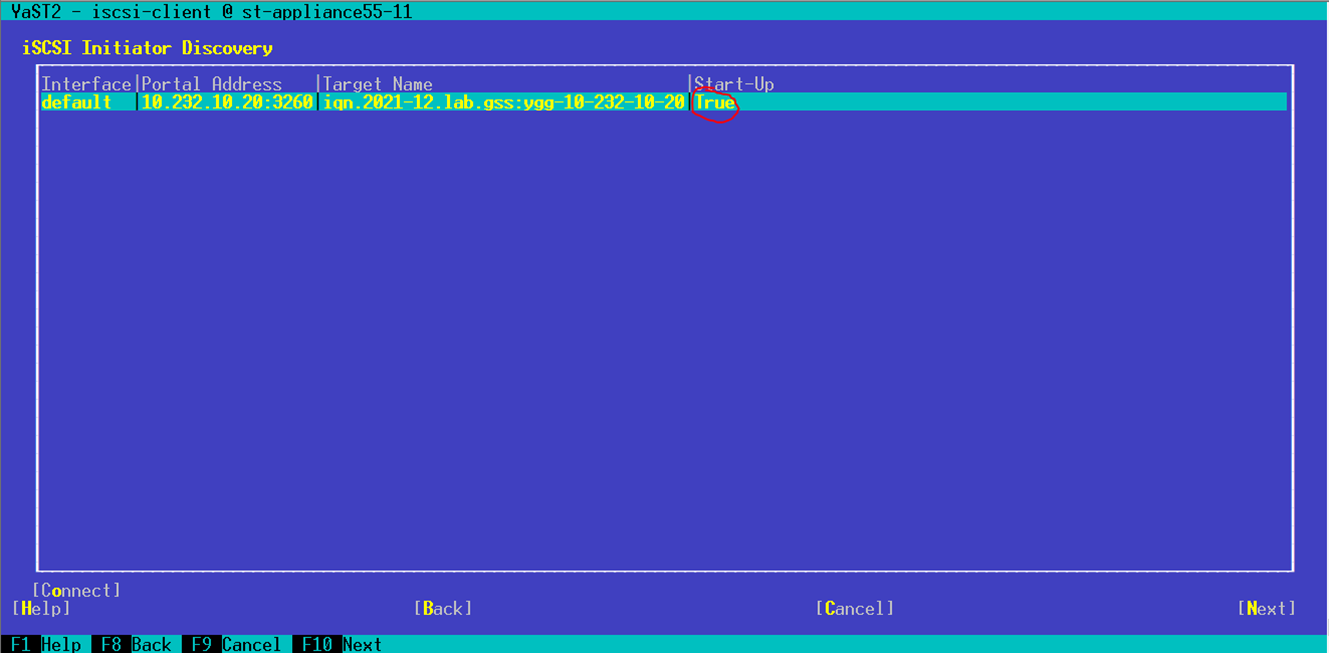
The device will appear in the table. Go to Connect.
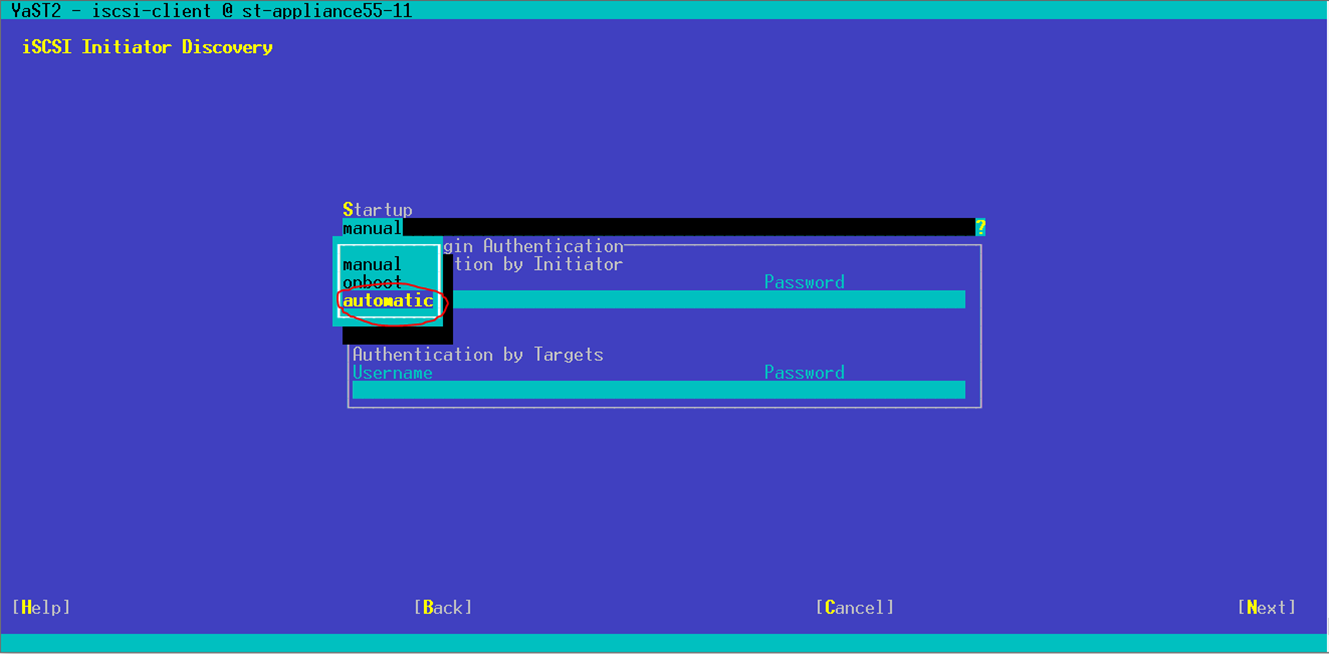
Go to Startup and select automatic. Use the down arrow key to expand the selction options. Then go to Next.
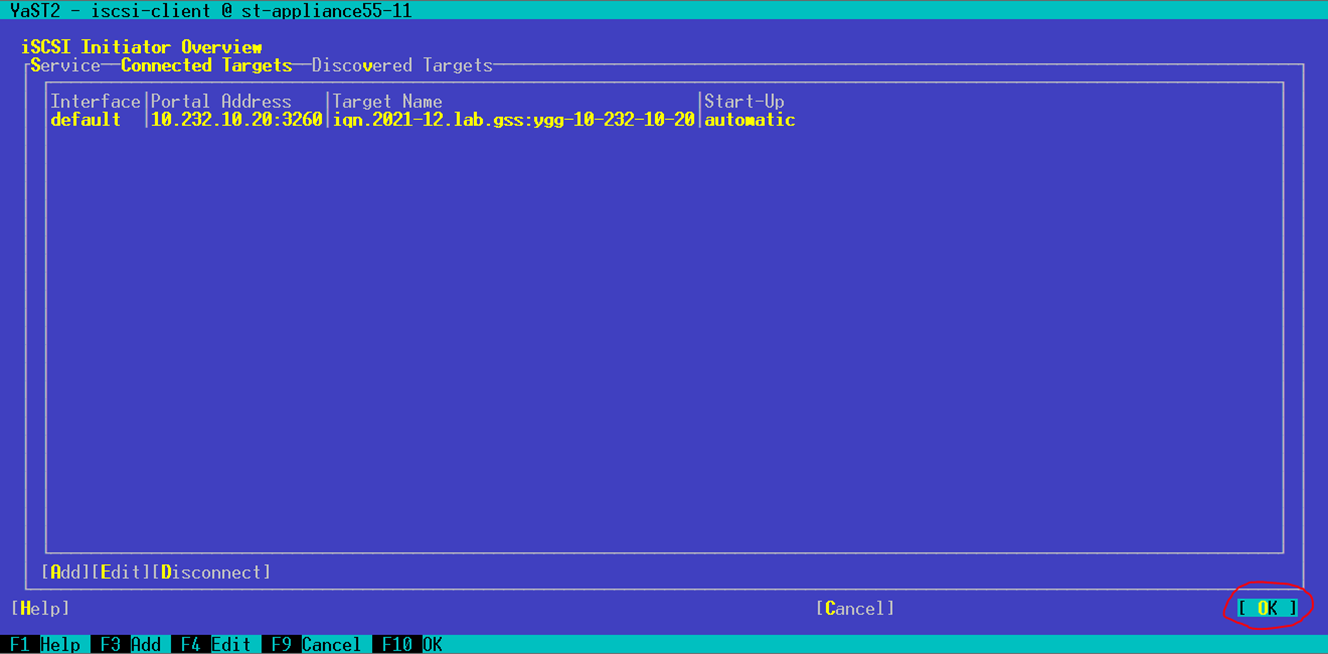
The initiator is now connected to the target. Go to Next.
All is set. Go to OK. Then quit Yast.
3.2. Configure SuSE services
systemctl enable iscsid
Edit the /etc/iscsid.conf file and change the line node.startup = manual to node.startup = automatic. Then run
systemctl start iscsid
systemctl enable iscsi
systemctl start iscsi
3.3. Verify that disk is present and enable multipath
fdisk -l

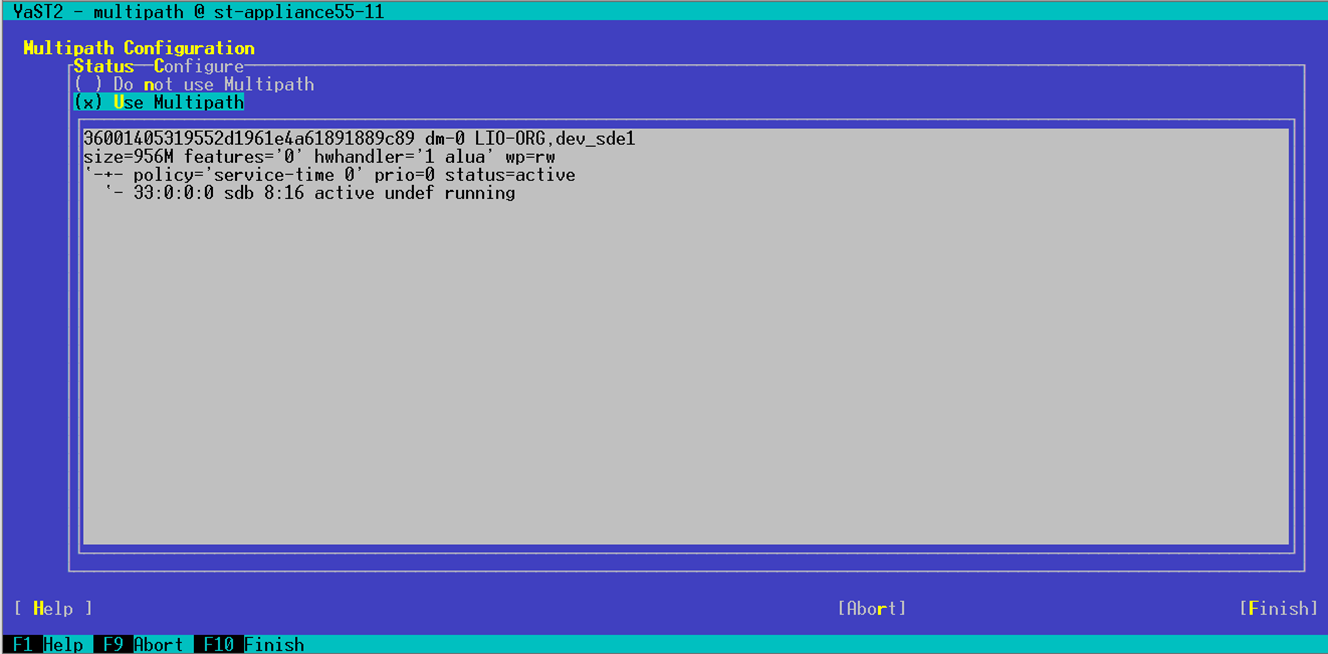
Enable multipath with Yast.
yast2 multipath
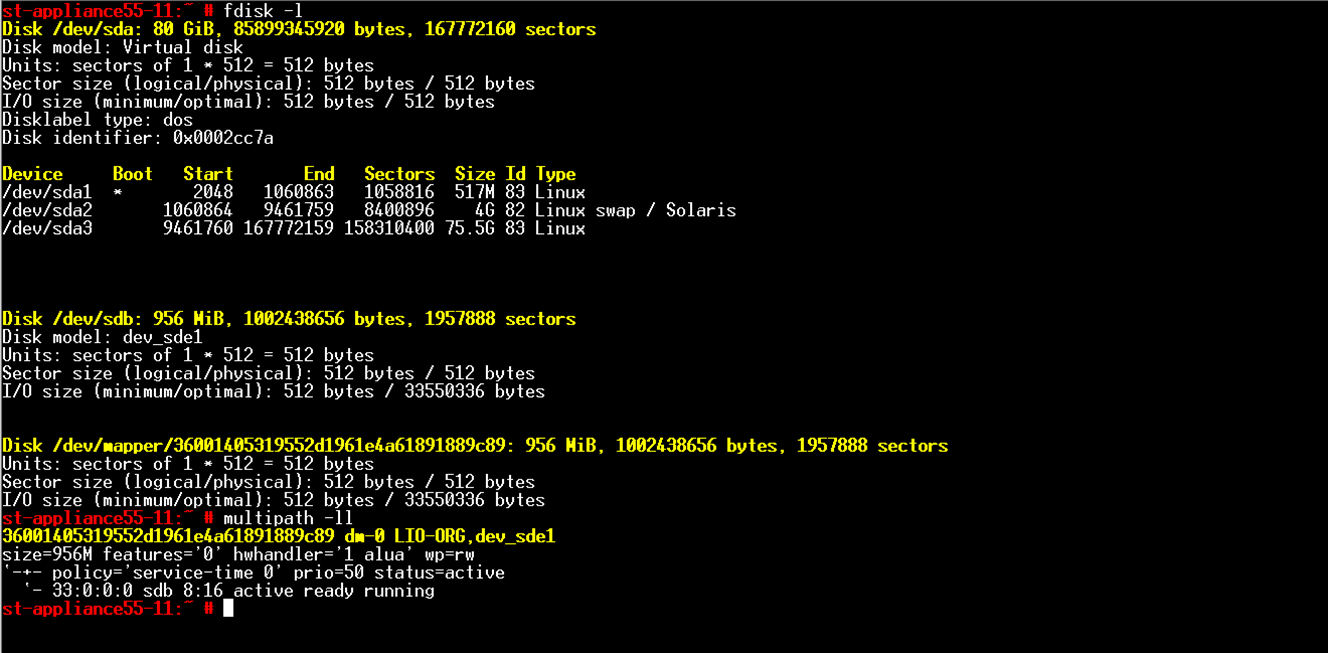
3.4. Reboot the server to verify that the configuration will be preserved upon restart
fdisk -l
multipath -ll
3.5. Configure the second iSCSI Initiator server as per the instructions above
ISCSI setup is now done
Additional notes
You can continue with the configuration of a SLEHA cluster as per the instructions in the SecureTransport 5.5 ApplianceGuide.
For older physical (hardware) appliances with SLES 11 use the instructions in the original KB article KB177014.
Enjoy using ST with SLEHA on VM using AP image from Axway!
Evgeni Evangelov