KB Article #180839
SHAREPOINT: Configuring the SharePoint connector for SecureTransport
Overview
The SharePoint Connector enables Axway SecureTransport (ST) to exchange files with SharePoint server. It is deployed as a Transfer Site plugin to an existing ST installation. Once deployed, it provides a new Protocol - SharePoint to the list of available protocols in the Add New Transfer Site page for User Accounts.
An introduction to general Transfer Site configuration is available in the SecureTransport’s Administration Guide under section Manage accounts: Transfer sites. [ST 5.5 Administrator Guide]
Prerequisites
A Microsoft Azure account with an active subscription
An Azure AD tenant
Access to Azure Active Directory
Installed SecureTransport 5.4 with Patch 35 or higher
Download
The SharePoint Connector for SecureTransport installation package can be downloaded from the AMPLIFY Repository.
Installation
To install the SharePoint Connector for SecureTransport, perform the following steps on all SecureTransport Server nodes:
Delete the following files/folders associated with the previous version of this step (if they exist):
<FILEDRIVEHOME>/plugins/transferSites/axway-site-sharepoint.jar<FILEDRIVEHOME>/plugins/transferSites/axway-site-sharepoint
The existing configurations in ST will be preserved.
Extract the securetransport-plugins-site-sharepoint-<plugin_version>.zip into <FILEDRIVEHOME>/plugins/transferSites
Restart all SecureTransport services
Setup Azure application and permissions
Register a new application
In order to access SharePoint REST endpoints exposed in Microsoft's Graph API, an application with specific permissions must be created.
Log into https://portal.azure.com using either a work or school account or a personal Microsoft account.
If your account gives you access to more than one tenant, select your account in the upper right corner. Set your portal session to the Azure AD tenant that you want.
Go to Azure Active Directory. Under Manage, select App registrations.
Click New Registration.
Specify application name and choose account types that can use the application:
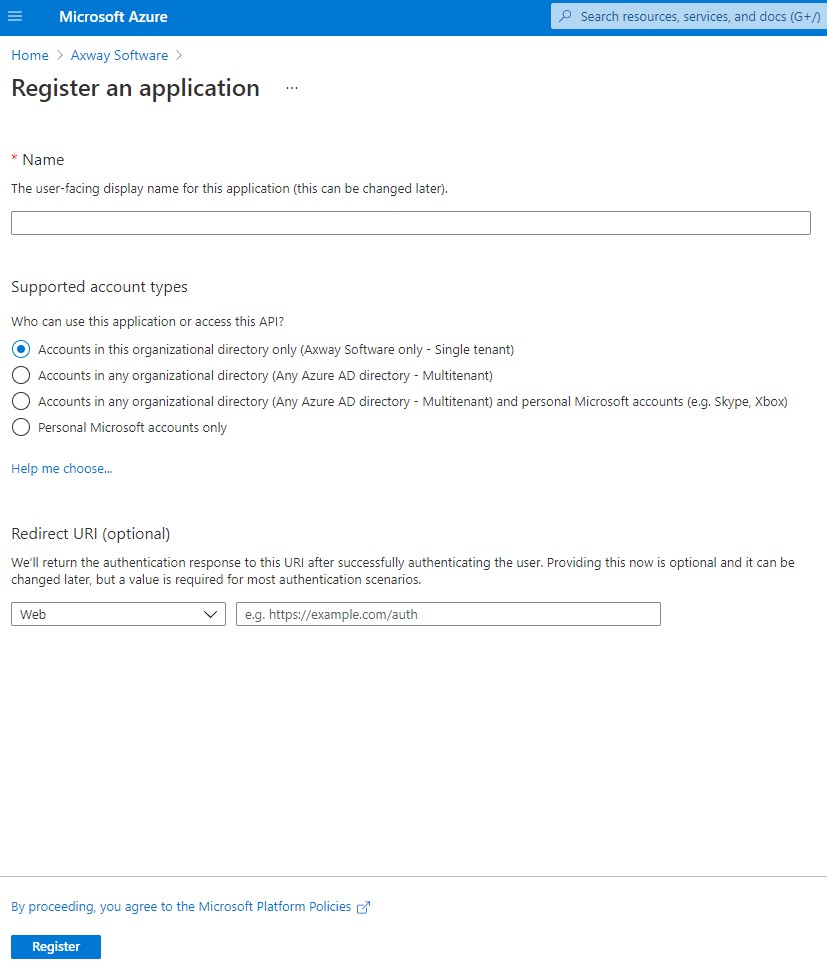
Register the application
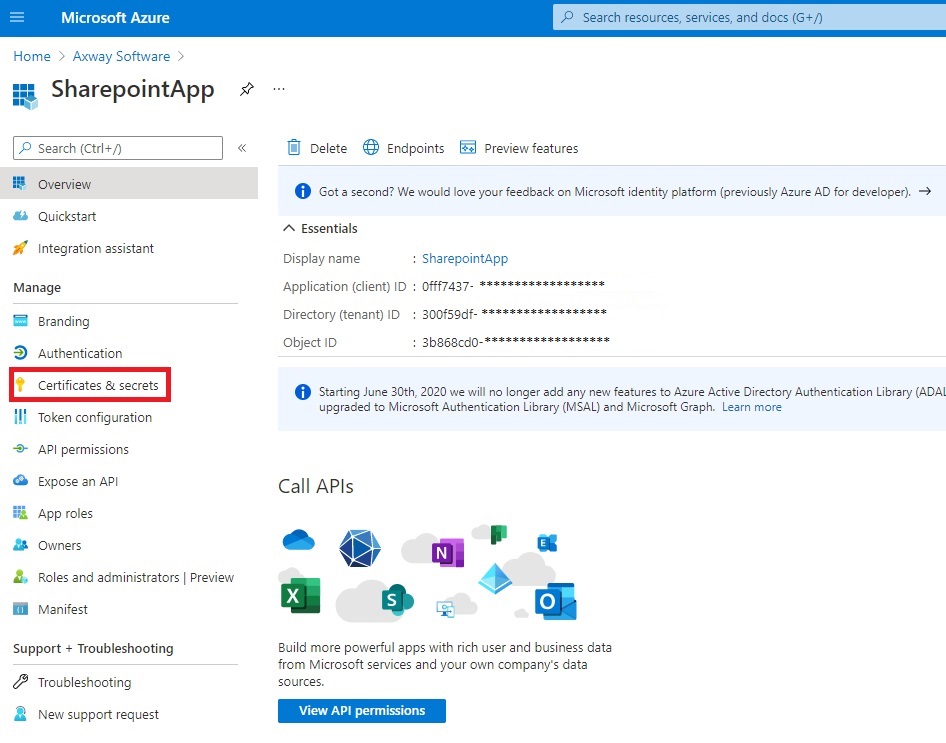
Add credentials to the application
There are two type of permissions in Microsoft Azure applications, Application and Delegated permissions.
For application permissions, the application must have imported certificate configured in order to make API requests.
For delegated permissions, an account username and password are enough.
To import a certificate, select the Certificates & secrets section from the app Overview page.
Setup Permissions
After an application is registered in Azure Portal App Registrations, the required permissions to access the web API must be assigned to that application.
You can select from two types of permissions for each web API:
Application permissions. The client application needs to access the web API directly as itself, without user context. This type of permission requires administrator consent.
Delegated permissions. The client application needs to access the web API as the signed-in user, but with access limited by the selected permission. This type of permission can be granted by a user, unless the permission requires administrator consent.
To add permissions to access resource APIs from your client application:
Open the application settings and go to API Permissions.
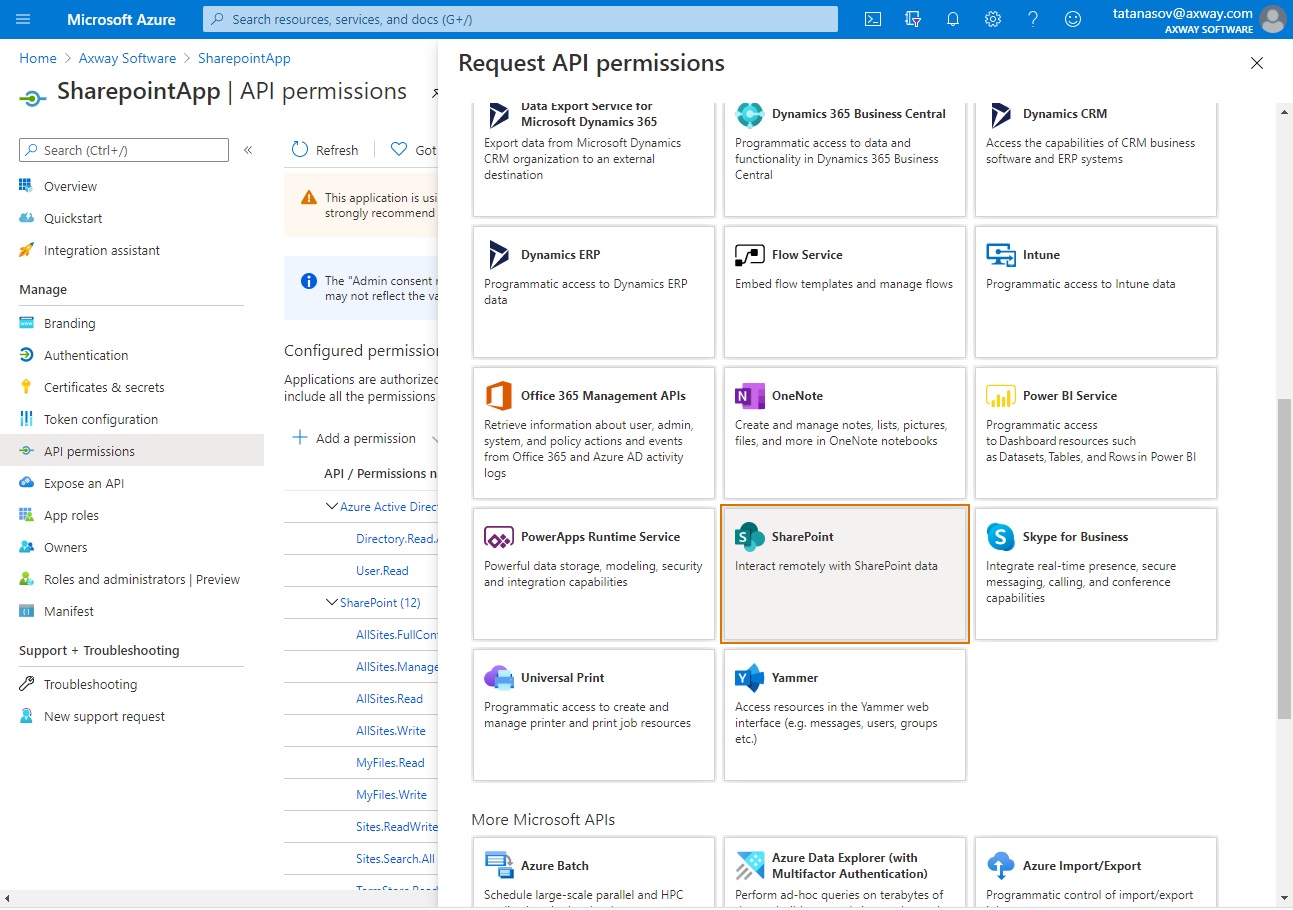
Click Add Permission.
Select SharePoint.
In case of
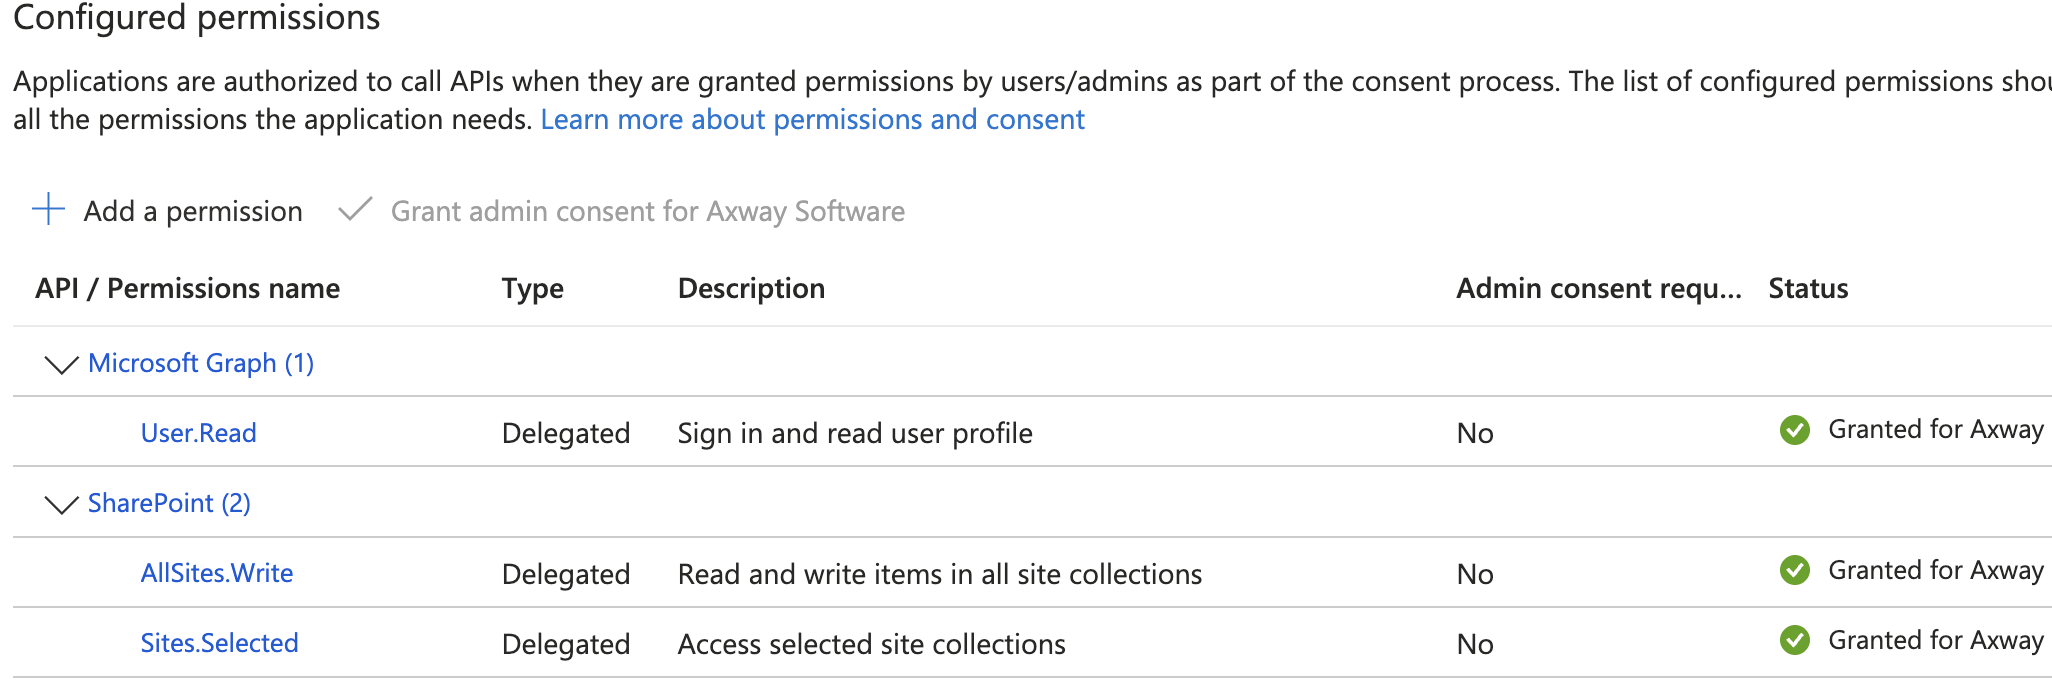
Delegated permissions:
- Microsoft Graph:
User.Read - Sharepoint:
Sites.Selected - Sharepoint:
AllSites.Write
Application permissions:
- Microsoft Graph:
Sites.Selected - Sharepoint:
Sites.Selected
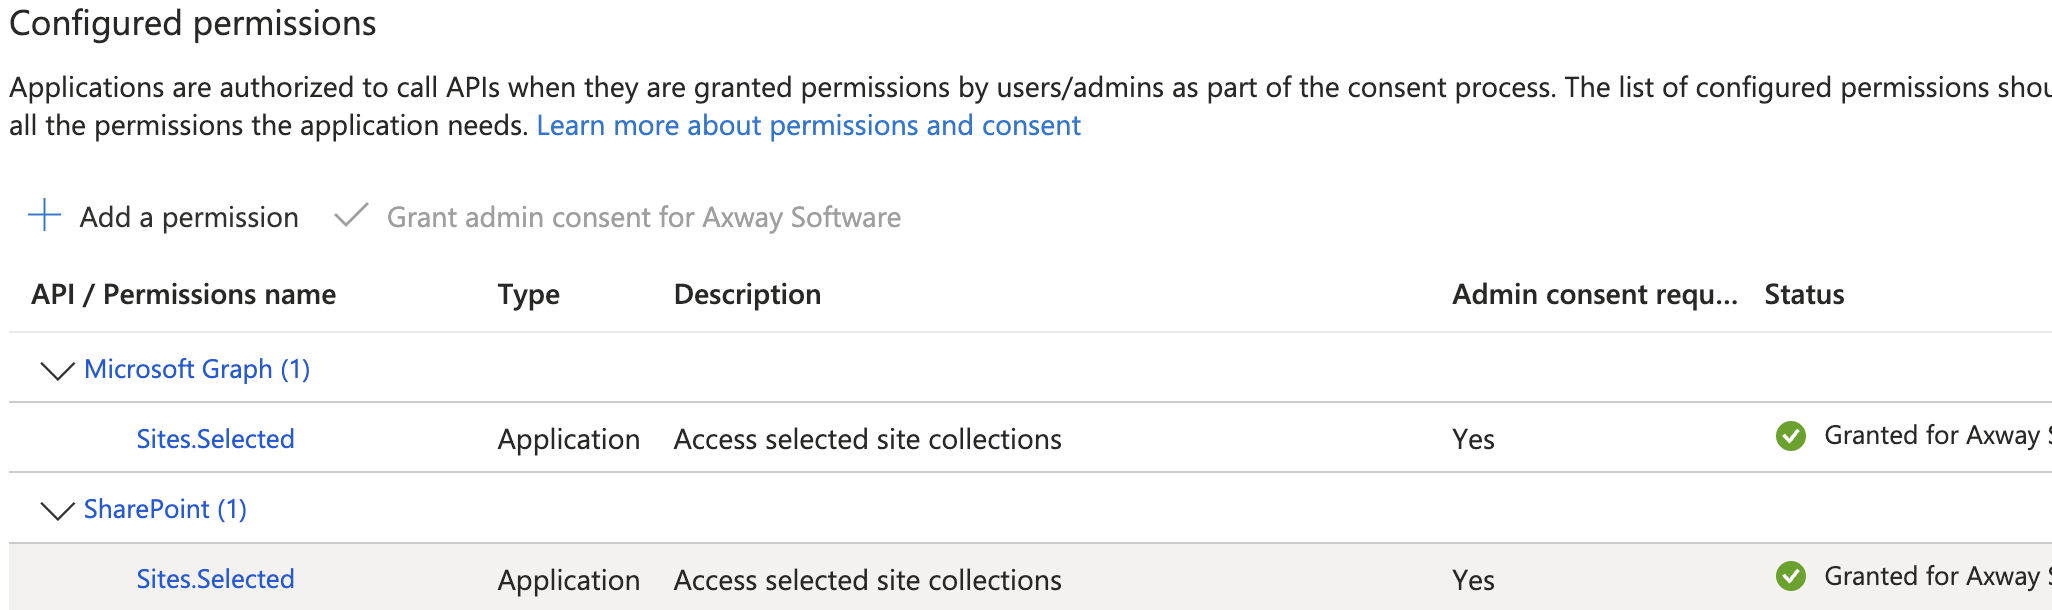
Click Add Permissions.
After the required Admin consent has been granted by an Azure AD administrator (on behalf of the user for delegated permissions), the application will be available for use in the APIs.
Troubleshooting
------------
Note that access tokens are cached in memory and reused for subsequent transfer attempts.
In case Azure "permission denied" error is encountered after Azure or Sharepoint permissions are modified, ST TM must restarted for the new permissions to take effect.
Setup SharePoint on premise configuration
SharePoint Server: User Setup
You will need to create a group owner for the SharePoint site and and then assign users to that group. The users of that group will be the users specified in the Transfer Site configuration page - they will connect to the SharePoint site via the plugin to transfer and manage files. The user group in question will need full permissions so that the users can connect to and operate in the SharePoint site.
For details how to set the site permissions, refer to the SharePoint documentation from Microsoft.
SharePoint Server: Versioning
It is recommended to enable both minor and major versioning. If versioning is enabled, SecureTransport accounts can pull the proper files based on version setup. In general this can be done from Library → Library Settings → Versioning Settings. More details including screenshots of the settings and additional guideline are available in Microsoft's Knowledgebase.
SharePoint Server: Document Library Setup
You will need to create site and a document library for the SharePoint. The permissions for the users created before would need to be assigned to this new site, so the user accounts specified in SecureTransport's Transfer Site can log into the site. The URL to the site must be in the format SHAREPOINTURL/newsitename. Other styles would not be recognized by ST plugin.
It is important to set the limit of the files here to 2 GB during site creation, so that you could manage larger files in your share point site.
For more details, refer to the Microsoft guide on creating a site and to the Microsoft guide on creating a library.
Enable SSL
The final step is optional and can be added for more security. SSL could be enabled, so that communication would be further protected. Online Microsoft documentation for enabling SSL can be found at Configuring SSL for SharePoint and Configuring SSL for SharePoint.
Any of these articles are subject to change as they belong to third-party vendors. It is recommened to consult with your SharePoint administrator.
Configure a Transfer Site in SecureTransport
Create a Transfer Site under an existing User Account. Choose SharePoint from the Transfer Protocol dropdown menu.
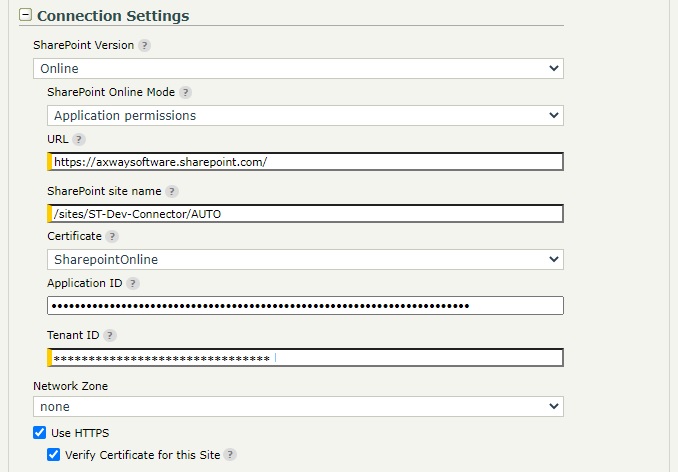
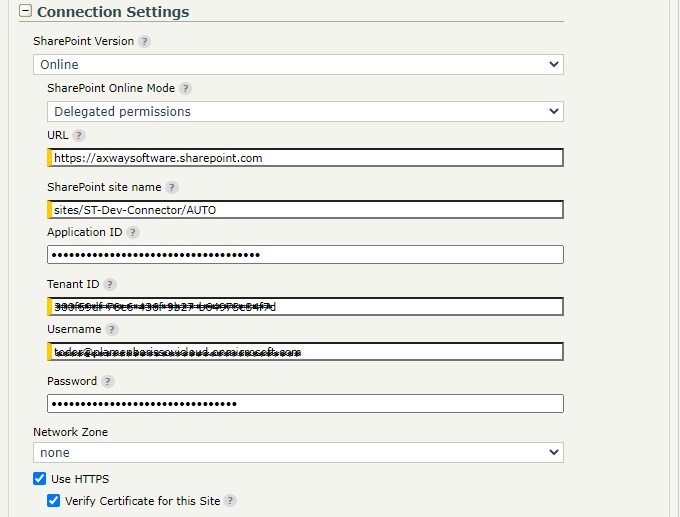
Connection settings: All connection credentials can be found in Azure Portal → App Registrations → App Overview page.
SharePoint version - Choose Online
SharePoint Online Mode - Choose between Application permissions and Delegated permissions. Follow the help instructions and fill all the information needed.
For Application permissions:
For Delegated permissions:
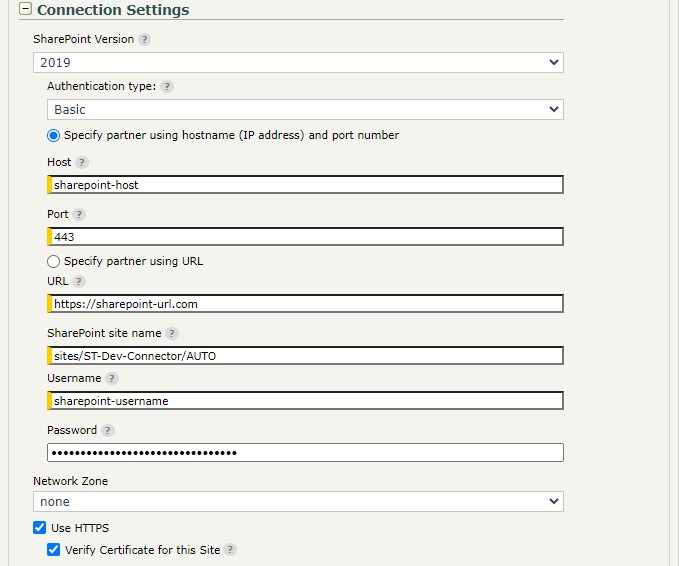
For on premise SharePoint 2016/2019:
Download/Upload settings: Configure the download and upload settings as for a regular Transfer site, as well as any needed PTA settings. Additional options are availale for both settings.
Download advanced options:
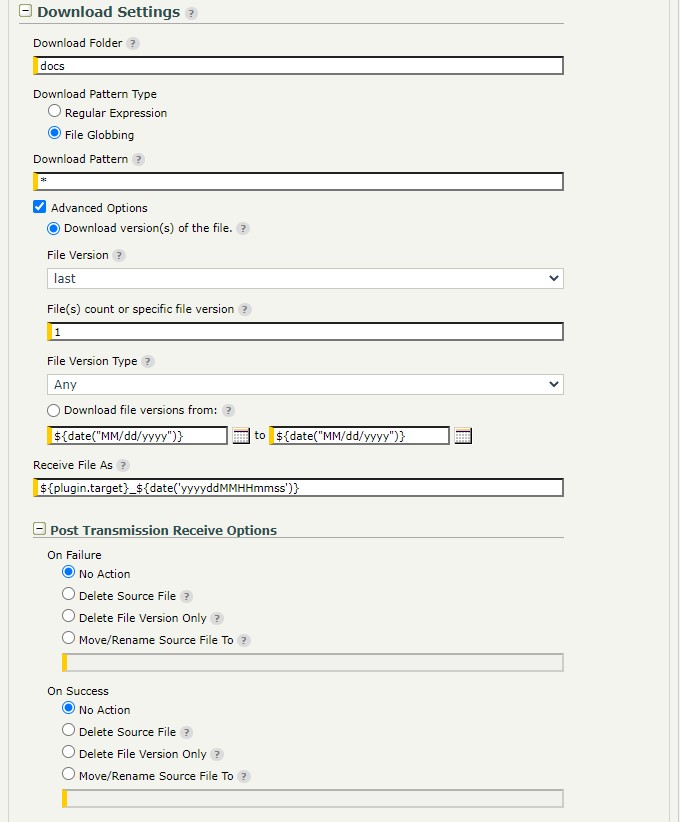
Download version(s) of the file: This options are specific for the SharePoint connector. Choose between download versions of matched files and match files within a period of time.
Delete file version only: available only when advanced option are selected and specified version is different from last 1 any.
Upload advanced options:
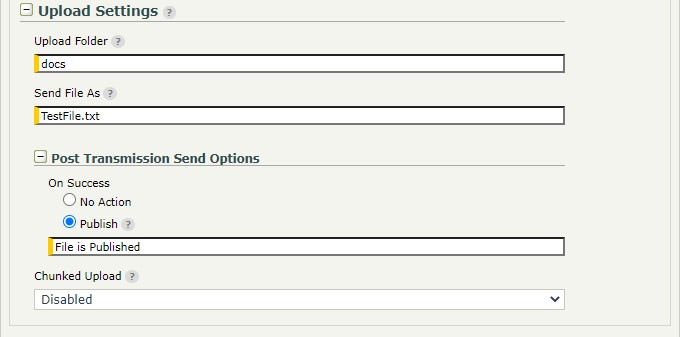
You can choose to publish the uploaded file and control the upload in chunks and the chunk size.
Test the setup
Server Initiated Pull by ST
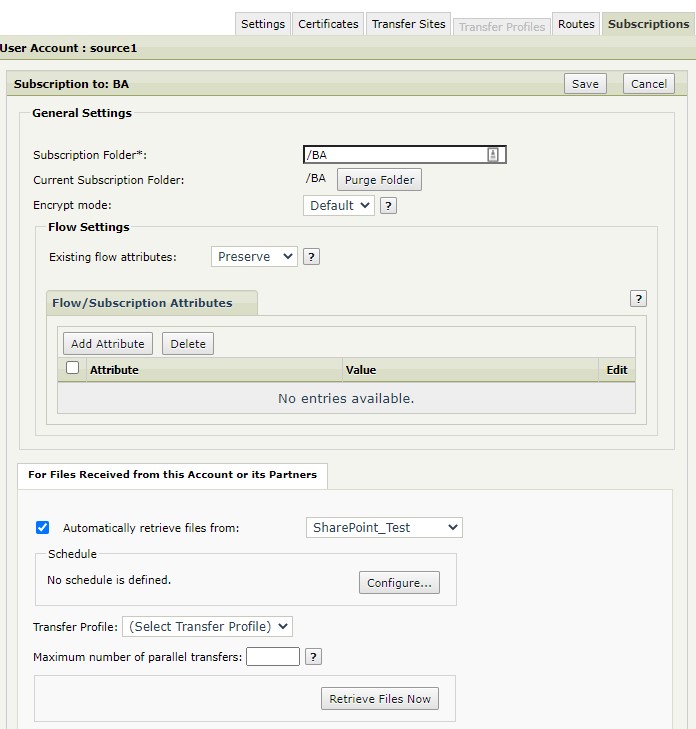
Create a Subscription to a Basic Application (BA).
In the For Files Received from this Account or its Partners section, select Automatically retrieve files from and select the SharePoint Transfer Site from the drop-down.
Set a schedule or alternatively, use the Retrieve Files Now button after the Subscription was saved (i.e. save the Subscription, re-open it and then use the button).
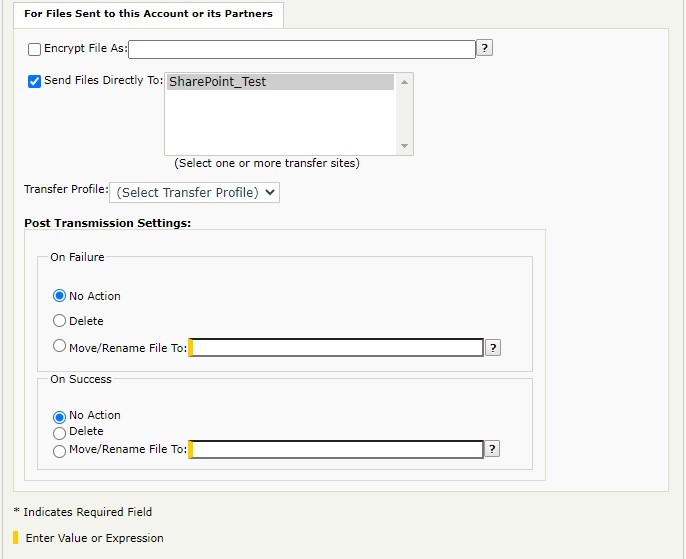
[optional] Under For Files Sent to this Account or its Partners, select Send Files Directly To and select a different Site where the test file should be sent to (local or remote location) after it's pulled from SharePoint.
Save the Subscription.
Place a test file in SharePoint in the folder that was defined under "Download Settings" of the SharePoint Site in ST.
Wait for the scheduler to trigger or use the Retrieve Files Now button in the Subscription.
Go to Operations → File Tracking → Show Advanced Search, then filter by "Protocol: SharePoint" and make sure each of the transfers succeeded with green check Transfer Status icon.
Server Initiated Push from ST
Create another Subscription to a Basic Application (BA).
Under For Files Sent to this Account or its Partners, select Send Files Directly To and select the SharePoint Transfer Site.
Login to ST with the user account and upload a test file in the Subscription Folder. Wait for a few seconds.
Go to Operations → File Tracking → Show Advanced Search, then filter by "Protocol: SharePoint" and make sure each of the transfers succeeded with green check Transfer Status icon.
If all have succeeded, go to SharePoint and check the folder defined under "Upload Settings" of the SharePoint Site in ST. The file should be there.
Troubleshooting and Notes
To enable extended debug logging, edit the <FILEDRIVEHOME>/conf/tm-log4j.xml config file. Find the com.axway.st.plugins.site logger element and set its level value to DEBUG.
The SharePoint Transfer Site can be configured using the /sites ST Admin REST API endpoint. The REST API definition of the SharePoint Transfer Site is available in Swagger YAML file format under <FILEDRIVEHOME>/plugins/transferSites/axway-site-sharepoint.
For a complete list, refer to the section Known Issues and Limitations in the README.md file included in the Connector archive.
When a transfer to the remote site has failed, the steps below can be used as guidelines how to troubleshoot the issue. Yet, as a first step, you should always verify that the configuration in the Transfer Site is correct and up to date.
- Go to Operations → File Tracking → Show Advanced Search, then filter by "Protocol: SharePoint".
- Click on the red X Transfer Status icon related to the failed transfer, expand the window and take a screenshot of the entire content. The screenshot will be requested by Axway Support in case it is needed to open a Support ticket.
- Click on the SessionID link, which redirects to the Server Log with filtered results related to the transfer session.
- Inspect the messages related to the transfer session.
- The detailed error/root cause is likely to be presented in these event messages. Click on the timestamp link next to the message that might hold the error. Expand the window. Detailed error message/stack trace is presented.
In the case of download issues, with the File is partially downloaded message in the Server Log or Partial download. Size mismatch message in the File Tracking page, attempt to use a cURL command to check if the Folders/files and their metadata is correct on the SharePoint transfer site.
Example cURL: GET https://SHAREPOINT/sites/AUTO/_api/web/GetFolderByServerRelativeUrl('/sites/AUTO/docs')/Files