KB Article #182333
HOWTO: Migration from XFB Gateway to SecureTransport and Flow Manager - Peltrans replacement
Purpose of this document
This article will provide assistance in the migration from XFB Gateway to SecureTransport and Flow Manager, especially in cases when Peltrans is used.
Table of contents
- What is Peltrans?
- Use case: Peltrans with custom User Messages (PI 99)
- How to achieve this use case with SecureTransport + Flow Manager?
What is Peltrans?
"Peltrans" is an XFB specific online command used to submit Transfer Requests, Message Requests, or Diffusion List Requests.
Use case: Peltrans with custom User Messages (PI 99)
This use case is about submitting a transfer (push) from a PeSIT source (client) via PeSIT, to a target, by specifying the local directory where the file is located, the filename and a custom value for User Message (PI99).
Command used to initiate the transfer from XFB
peltrans -type TRANS -mode I -dir O -application DEFAULT_B -da PESIT_TARGET_PARTNER -oa PESIT_ORIGINATOR -fc path/to/test.txt -snd_msg "PI_99"
Where:
da → the destination alias (PeSIT target)
dir → the direction (Outgoing - O)
oa → the originator alias (PeSIT source)
fc → the location of the file and the filename
snd_msg → the custom PeSIT User Message (PI99)
How to achieve this use case with SecureTransport + Flow Manager?
Flow Manager will be used to define the flow and to deploy the configuration in SecureTransport.
Configuration in Flow Manager
1. Create a pattern
Create the following pattern to define the following flow: SecureTransport pulling a file via FolderMonitor (protocol: Folder) and routes it to a partner via Pesit (Target).

2. Register the SecureTransport instance
Register your SecureTransport instance by following the guides below:
Before registering SecureTransport
Registration status and results
3. Create a partner
Create the partner (Source) that will be used to pull the file via protocol "Folder".
General info:
Name
Domains

Communication Profile:
Name
Folder: ${DXAGENT_TRANSFERSAPI_FOLDER}
Folder as advanced expression: checked
Protocol: Folder
Type: Server

4. Create and define the PeSIT partner (target)
General info:
Name
Domains
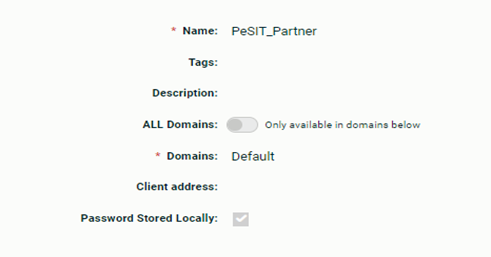
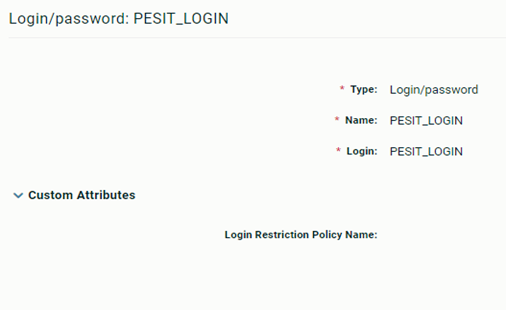
Credentials:
Type: Login/Password
Name
Login
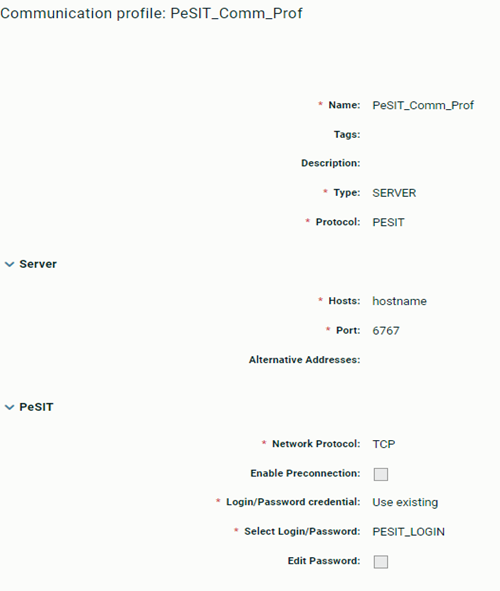
Communication Profile:
Name
Type: Server
Protocol: PeSIT
Host
Port
Network Protocol: TCP
Login/Password credential: Use existing
Select Login/Password
5. Create and configure the Template
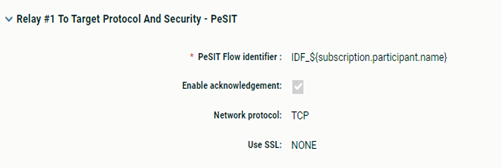
Configure Relay To Target PeSIT exchange:
PeSIT flow identifier
Configure Source Partner:
Source Partner (created in Step 3)
Sender Server Communication profile (created in Step 3)

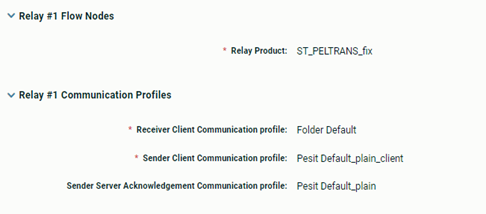
Configure SecureTransport Relay:
Flow Nodes
• Relay Product (registered and configured in Step1)
Communication Profiles
• Receiver Client Communication profile: Folder Default
• Sender Client Communication profile: Pesit (client)
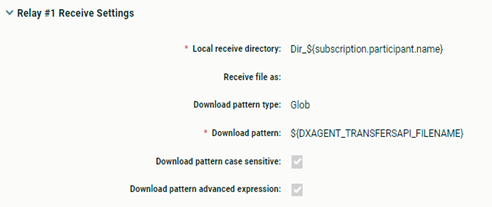
• Receive Settings:
› Local receive directory
› Download pattern type: Glob
› Download pattern: ${DXAGENT_TRANSFERSAPI_FILENAME}
› Download pattern advanced expression: checked
• Send properties:
› User Message: ${DXAGENT_TRANSFERSAPI_PARM}
› Preserve filename: do_not_send
› File type
› Record type
› Max record length

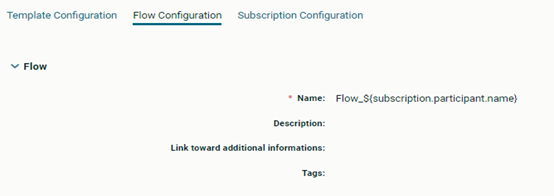
6. Create and define the Flow Configuration
Specify:
Name
7. Define Subscription configuration
The subscription contains all the information required to create a fully functional flow deployed to each product. You can subscribe different participants to the same Flow Template; each subscription creates a new Flow. You must deploy flows to each product to be live and ready.
Domains
Template (created in Step 5)
Target Partner (created in Step 4)
Receiver Server Communication Profile (created in Step 4)

8. Save and deploy

Result: The configuration has been deployed from Flow Manager to SecureTransport
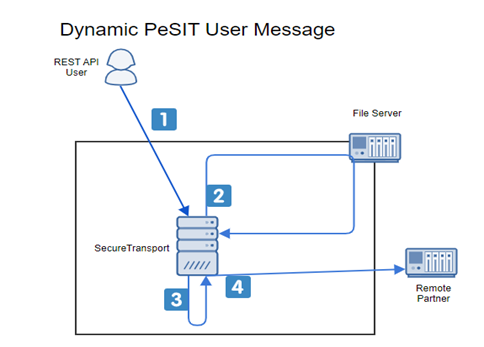
Use Case in SecureTransport
In the diagram below we can see the use case.
The REST API Request is sent from a user to SecureTransport, where the KEY=VALUE is defined
SecureTransport performs the pull request, and the file arrives in a subscription folder
Subscription is triggered
The last step is "Send To Partner" where we can use the ${DXAGENT_TRANSFERSAPI_KEY} as a PeSIT User Message
Configuration in SecureTransport
The configuration has been deployed using Flow Manager.
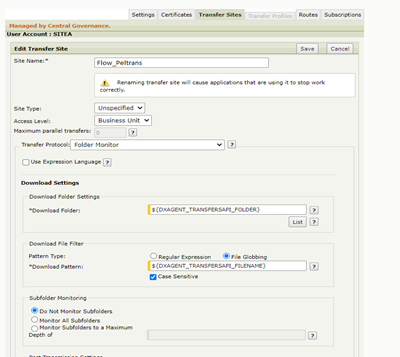
1. Account SITEA
Transfer Site (Folder protocol)
The account and the transfer site are used to pull the file from a local directory (via protocol Folder).
Route with Send to Partner step
Here (inside of the Route), the account and the Transfer Site used to send the file to the final PeSIT target and the User Message (PI99) need to be specified.
Subscription
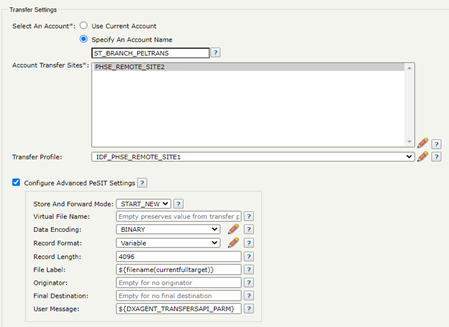
2. Account ST_BRANCH_PELTRANS
Transfer Site (PeSIT protocol)
This account and its transfer site are used to send/ route the files received in the subscription folder of account SITEA (files received via protocol Folder) to the final PeSIT target.
How to trigger the flow in SecureTransport
Pull a file via RestAPI from a local directory (source directory) and add it in the monitored directory (destination directory) and specify a value for the PeSIT User Message. The destination folder is configured to be the subscription folder of the Advanced Routing Application.

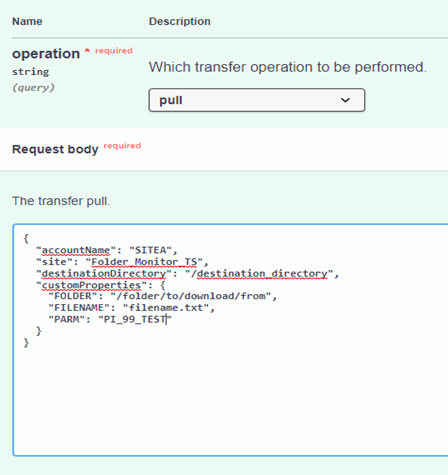
where
FOLDER (source directory) has been declared in the Folder Monitor Transfer Site with ${DXAGENT_TRANSFERSAPI_} prefix.
FILENAME has been declared in the Folder Monitor Transfer Site with ${DXAGENT_TRANSFERSAPI_} prefix.
PARM has been declared in the Send to Partner step with ${DXAGENT_TRANSFERSAPI_} prefix.
Results:

The file has been pulled via folder protocol (1st transfer) and routed via PeSIT to the final target (2nd transfer). When looking at the transfer details of the 2nd transfer (PeSIT) the User Message should be available in the FPDU CREATE protocol command:

Notes:
The configuration can be done directly in SecureTransport as well.
Instead of Folder Monitor other protocols can be used as well (SFTP, FTP, HTTP, PeSIT) for the first part of the flow.