KB Article #183140
Using the OAuth 2.0 Authentication Plugin with the Okta provider
Summary
This article provides information how to configure an Authorization Code flow in SecureTransport with OKTA as Identity Provider for user and administrator authentication.
Resolution
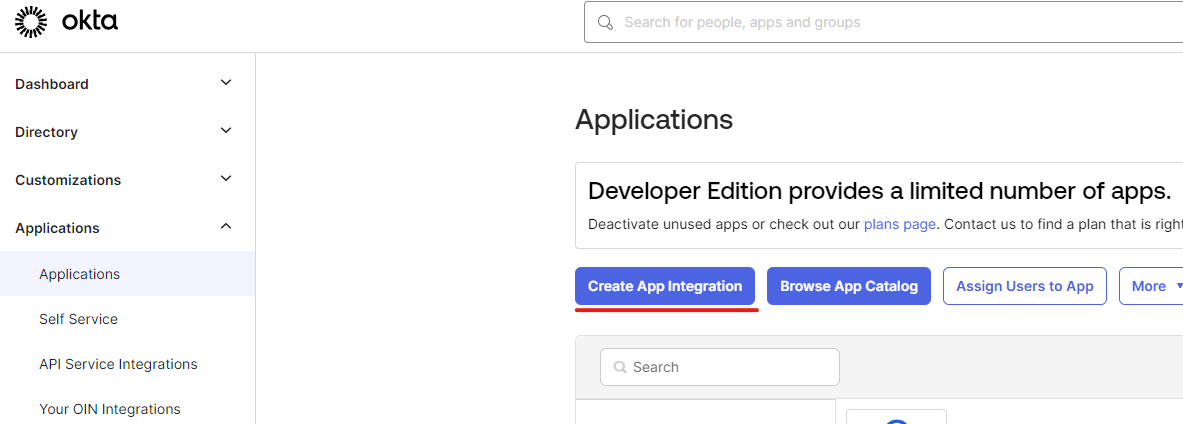
Configure OKTA
Login to the OKTA server and create a New Application (Native).
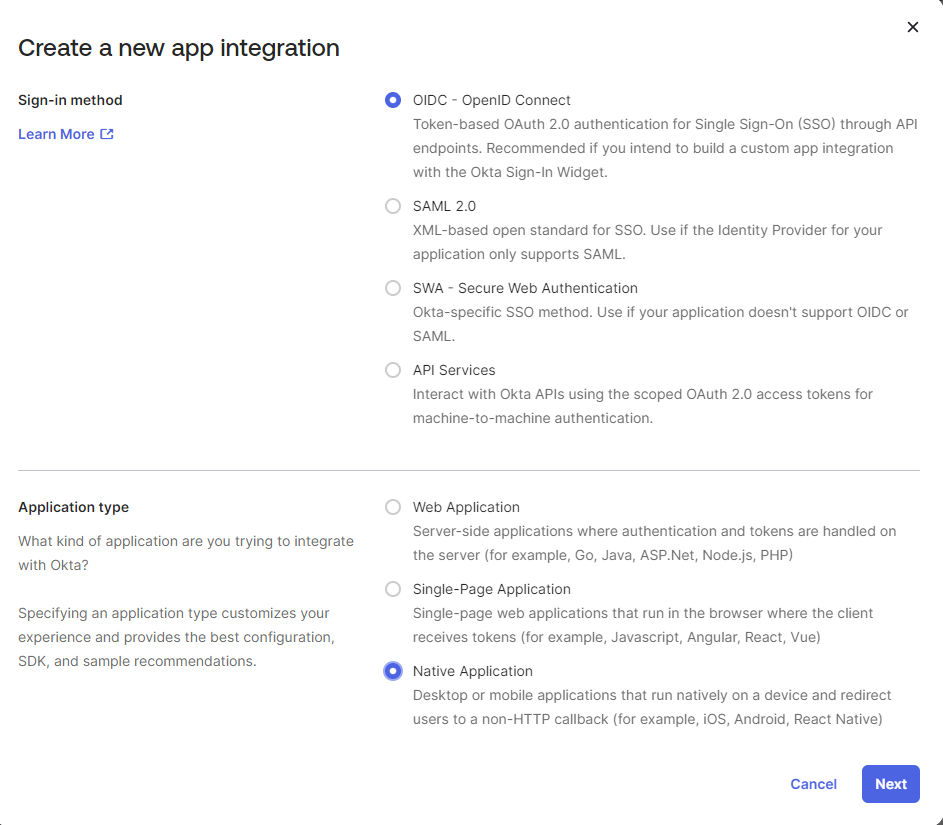
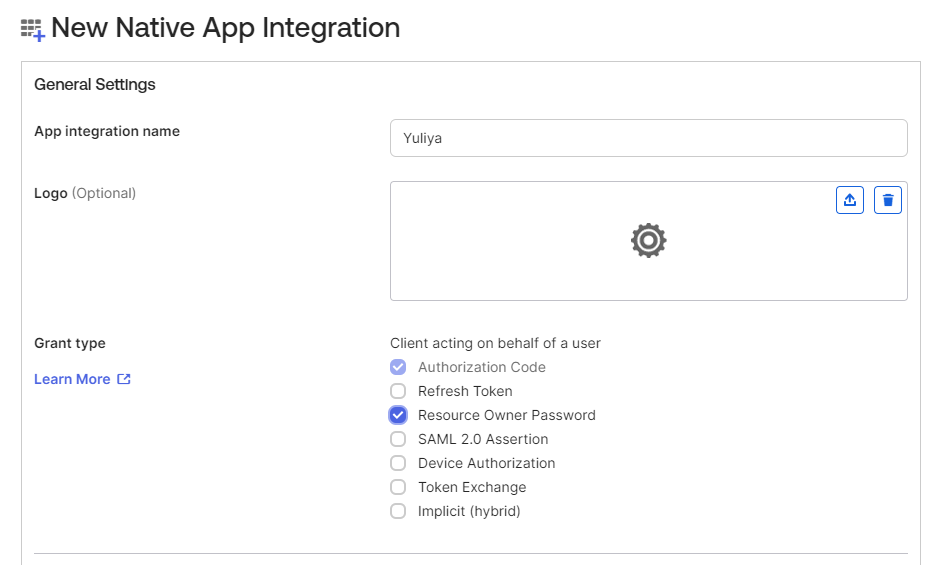
Provide a name for the application and select Resource Owner Password.
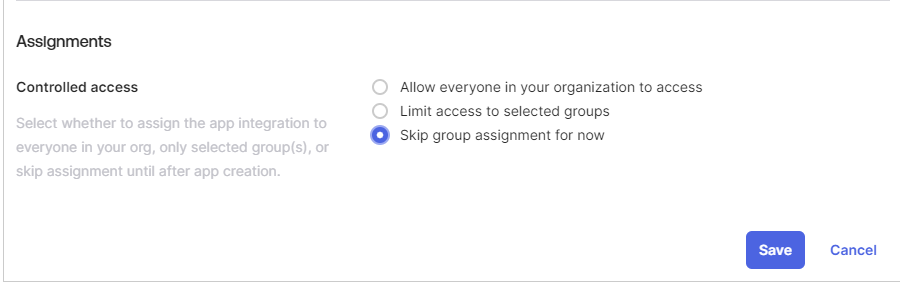
Select assignments and then Save.
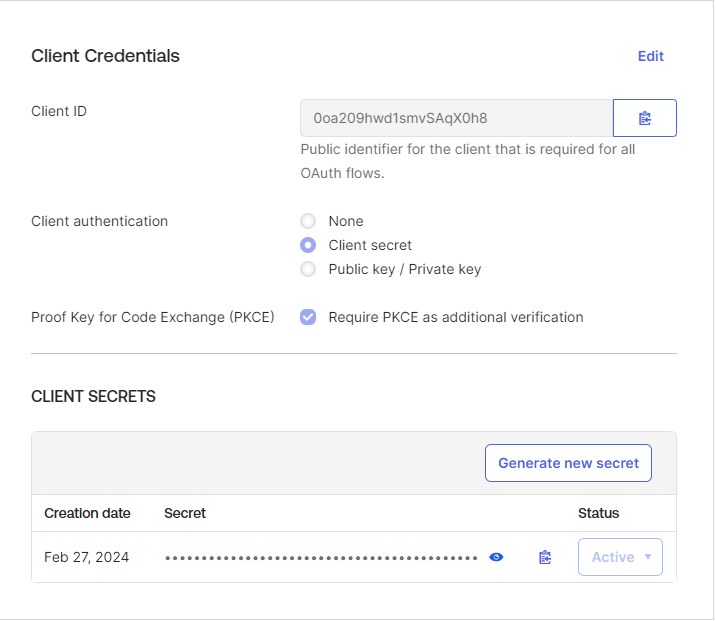
Edit the Client Credentials page and select Client secret. Copy the client secret and store it for later use.
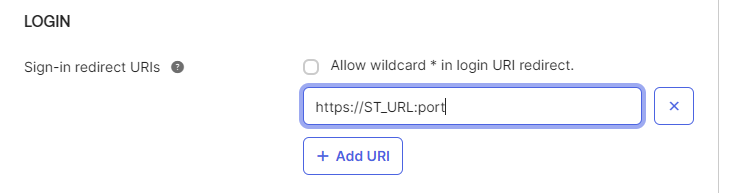
Put a Redirect URI. Type the address of your ST Server (or Edge, or Load Balancer) in the field; this will be the URL where the users/administrators will be redirected to after successful authentication.
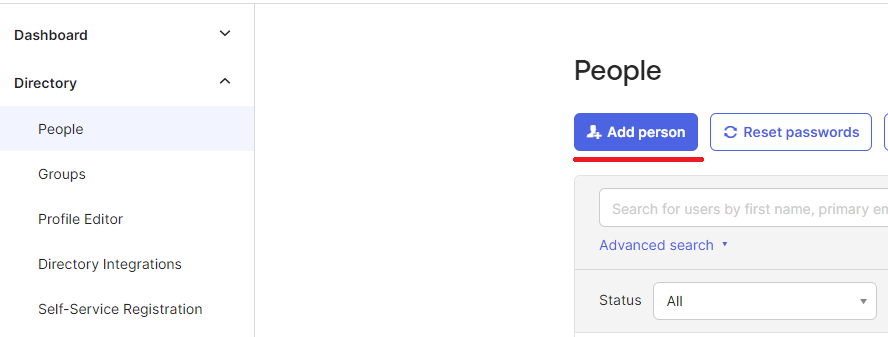
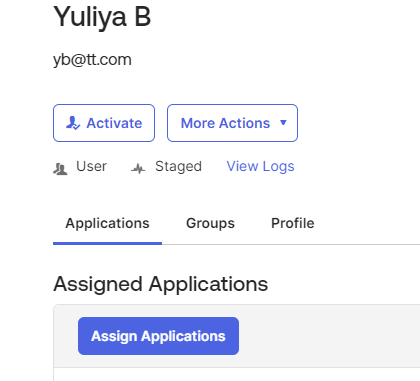
Go to Directory → People and create a user. Provide a name and an email address.
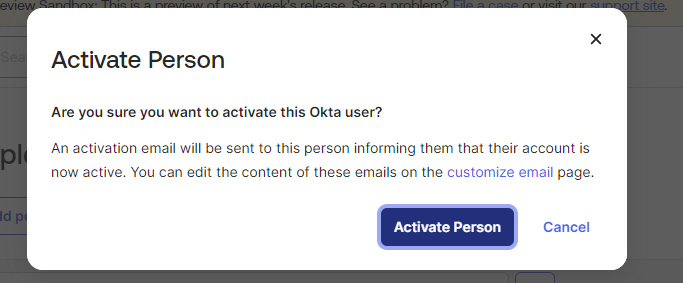
Activate the user and assign it to the Application.
Configure SecureTransport
Install the OAuth Authentication plugin for SecureTransport as described in KB 180803.
Go to the Admin UI → Server Configuration page and set the HTTP daemon redirect, setting the following parameters:
| Option | Value |
| Http.AllowedAuthenticationParameters | code
|
| Http.AllowedAuthenticationParametersMaxSize | 32768
|
| Http.FdxAuthReply | PREAUTH
|
| Http.RedirectWhiteList | (.*)
|
| Http.Security.SameSite | Lax
|
If administrators authentication will be used with OKTA, set the following parameters:
| Option | Value |
| Admin.Security.SameSite | Lax
|
| LoginSettings.Admin.PREAUTH | true
|
Configure the OAuth Authentication plugin under the Admin UI → Server Configuration, setting the below parameters as shown. Keep in mind that all option names are prefixed with Plugins.Authentication.oauth-authentication-plugin..
| Option | Value |
| authorizationCodeParameter | code
|
| authorizationHeader | AUTHORIZATION
|
| authorizationUrl | https://ADDRESS_OF_OKTA_SERVER/oauth2/default/v1/authorize
|
| cipherSuites | TLS_ECDHE_RSA_WITH_AES_256_GCM_SHA384, TLS_ECDHE_RSA_WITH_AES_256_CBC_SHA384, TLS_ECDHE_RSA_WITH_AES_128_GCM_SHA256, TLS_ECDHE_RSA_WITH_AES_128_CBC_SHA256, TLS_DHE_RSA_WITH_AES_256_GCM_SHA384, TLS_DHE_DSS_WITH_AES_256_GCM_SHA384, TLS_DHE_DSS_WITH_AES_256_CBC_SHA256, TLS_DHE_RSA_WITH_AES_256_CBC_SHA256, TLS_DHE_RSA_WITH_AES_128_GCM_SHA256, TLS_DHE_DSS_WITH_AES_128_GCM_SHA256, TLS_DHE_DSS_WITH_AES_128_CBC_SHA256, TLS_DHE_RSA_WITH_AES_128_CBC_SHA256, TLS_RSA_WITH_AES_256_CBC_SHA256, TLS_EMPTY_RENEGOTIATION_INFO_SCSV
|
| clientId | <The clientID from the Application in OKTA>
|
| clientSecret | <The secret created and copied from the Application in OKTA>
|
| connectTimeout | 10000
|
| introspectionEndpoint | <empty> (you must clean the pre-existing string from this field)
|
| keysUrl | https://ADDRESS_OF_OKTA_SERVER/oauth2/default/v1/keys
|
| oidcEnabled | true
|
| protocols | TLSv1.2, TLSv1.3
|
| redirectUri | https://${plugin.localAddress}
|
| revokeUrl | https://ADDRESS_OF_OKTA_SERVER/oauth2/default/v1/revoke
|
| scope | openid
|
| signingKey | <empty> (you must clean the pre-existing string from this field)
|
| socketTimeout | 10000
|
| tokenUrl | https://ADDRESS_OF_OKTA_SERVER/oauth2/default/v1/token
|
| tokenVerificationMode | jwt
|
| userIdentityAttribute | sub
|
| useSecure | true
|
| validateTokenSignature | true
|
| verifyCertificate | true
|
Create a user in ST, as described in KB 180803 and then test the login to ST with it. In this article the oidcEnabled option is enabled, the ID token will be used to define the user identity. The ST account username must match the value of the id token attribute chosen as userIdentityAttribute - in this example the attribute is sub, which would have value looking like 00uc2k1jucUxSnVAg123