KB Article #191660
Amplify Fusion Single Sign On using AWS IAM Identity Center
Amplify Fusion Single Sign On using AWS IAM Identity Center
The guide will describe how to configure Amplify Fusion to enable log on via Single Sign-On (SSO) using AWS IAM Identity Center. The guide was created using Amplify Fusion 1.10.
The basic steps are :-
- Configure AWS IAM Identity Center with SAML 2.0 application
- Configure Single Sign On in the Amplify Fusion Manager module by importing the AWS IAM Identity Center SAML XML file
- Test the SSO Integration as Follows
- Assign an AWS IAM Identity Center user or group to the SAML 2.0 application
- Sign on to Amplify Fusion using the single sign on option as the IAM Identity Center user
Configure an AWS IAM Identity Center Application
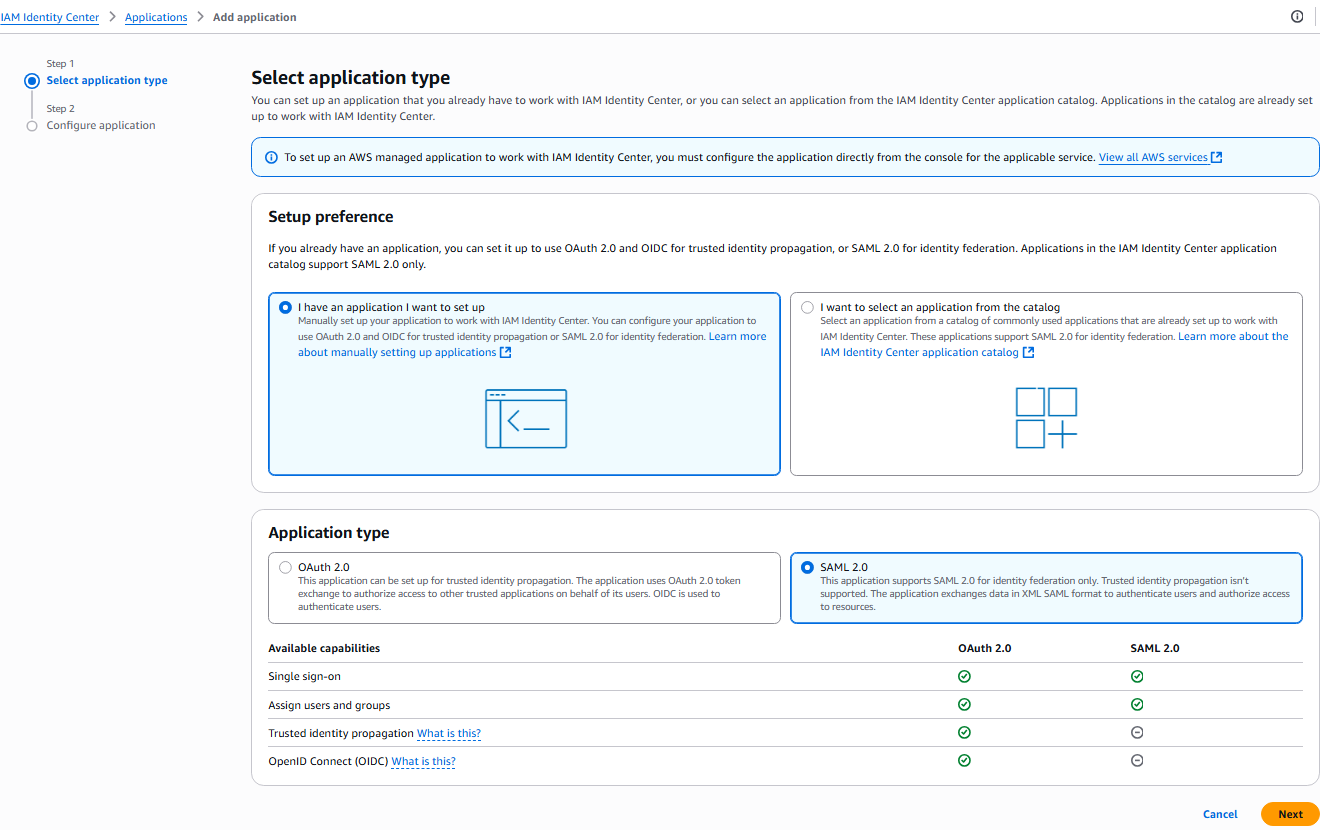
Configure application
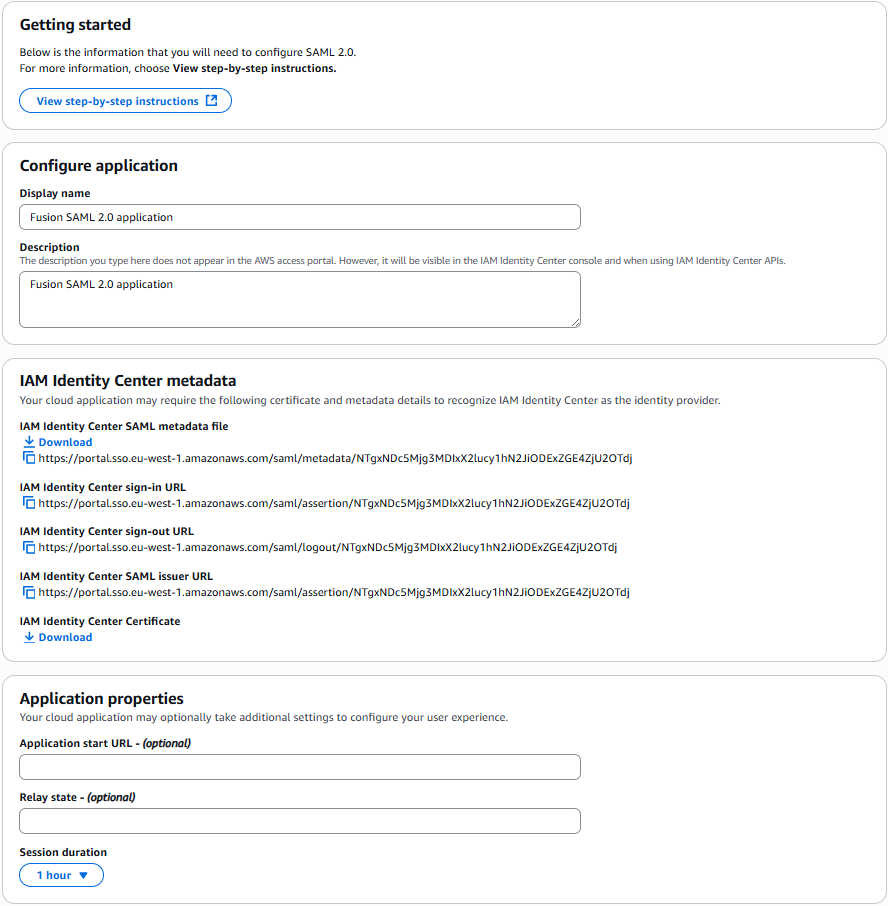
- Download the IAM Identity Center SAM metadata file for later input into Amplify Fusion configuration.
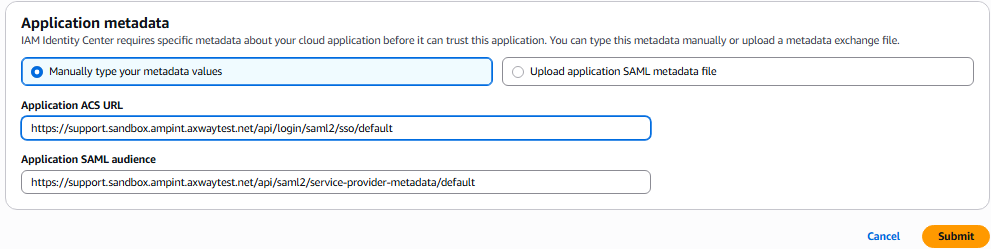
- Manually type your metadata values.
- Application ACS URL - set this to
https://<tenant><host>/api/login/saml2/sso/default, where tenant and host are based on your control plane URL. For example, https://support.sandbox.ampint.axwaytest.net/api/login/saml2/sso/default - Application SAML Audience - set this to
https://<tenant><host>/api/saml2/service-provider-metadata/default, where tenant and host are based on your control plane URL. For example, https://support.sandbox.ampint.axwaytest.net/api/saml2/service-provider-metadata/default
- Application ACS URL - set this to
- Click submit
- Click
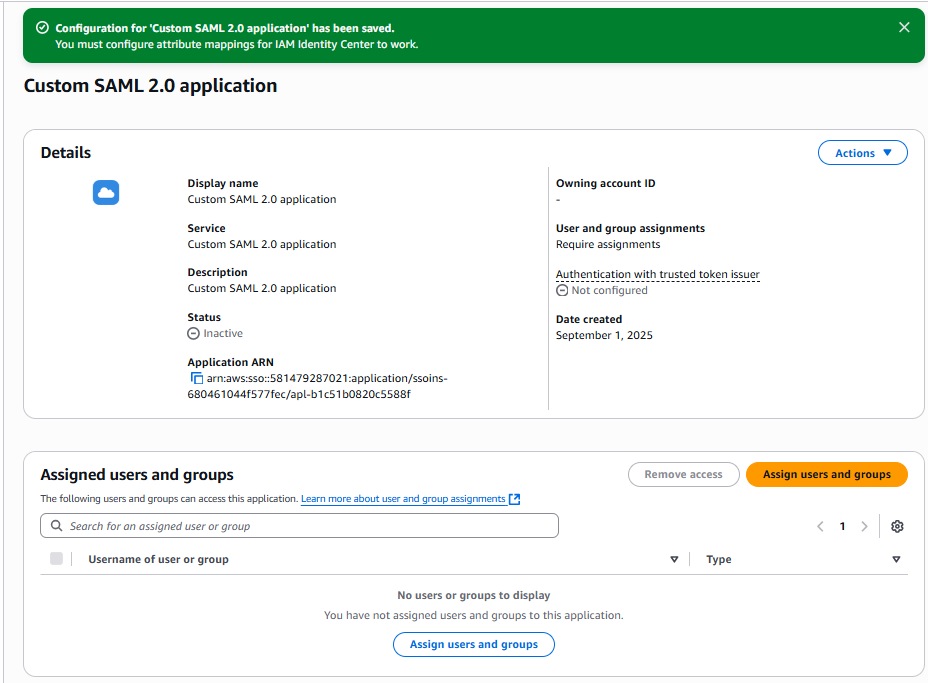
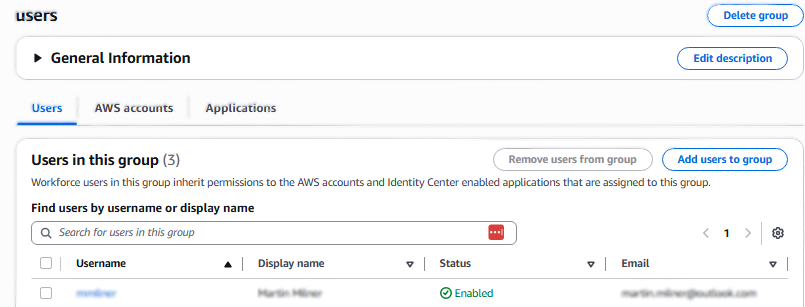
Assign Usersafter creating the application in Identity Center, and select the users or groups you wish to grant access to this application.

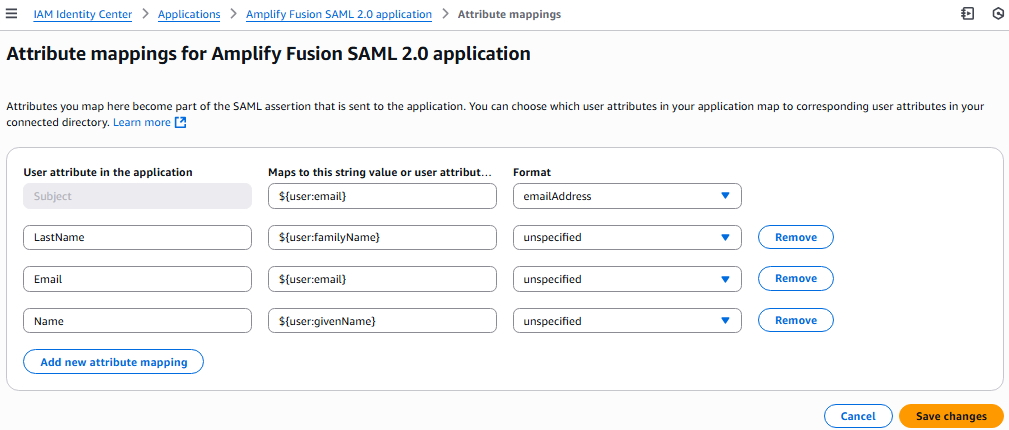
- Configure Attribute mappings as below (Actions-> Edit attribute mappings)

Configure Amplify Fusion Single Sign On
- In this section, we'll use the AWS IAM Identity Center SAML metadata XML file we downloaded to configure Amplify Fusion SSO.
- Click on Manager -> Single Sign On
- Enter a name and a description (e.g. AWS IAM Identity Center SSO)
- Click on the Choose File button in
SAML V2.0 Descriptor Filesection and select the XML file you downloaded above. This will populate several of the form fields

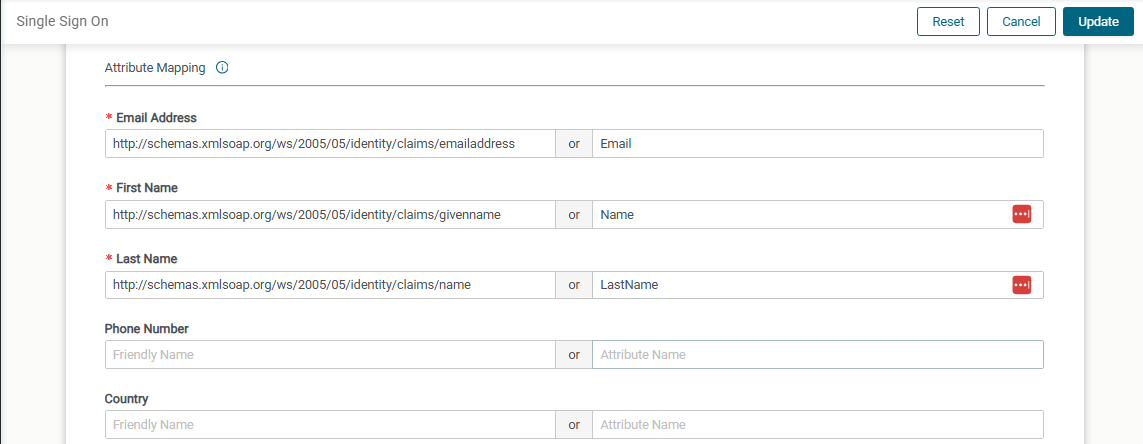
- Scroll down to the
Attribute Mappingsection and enter the following:EmailforEmail AddressAttribute NameNameforFirst NameAttribute NameLastNameforLast NameAttribute Name
- Leave Phone Number and Country blank
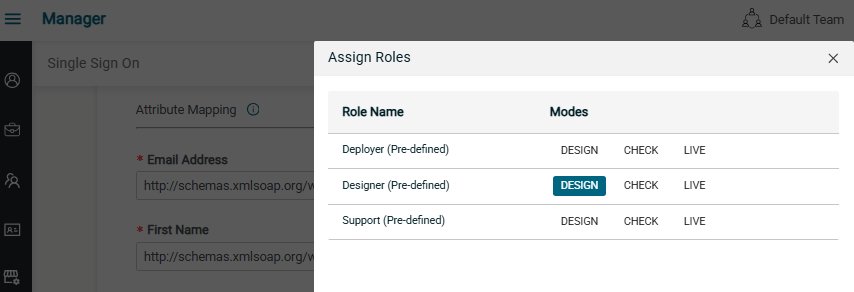
- Enable
Provision New Usersand set the Default Roles and Teams
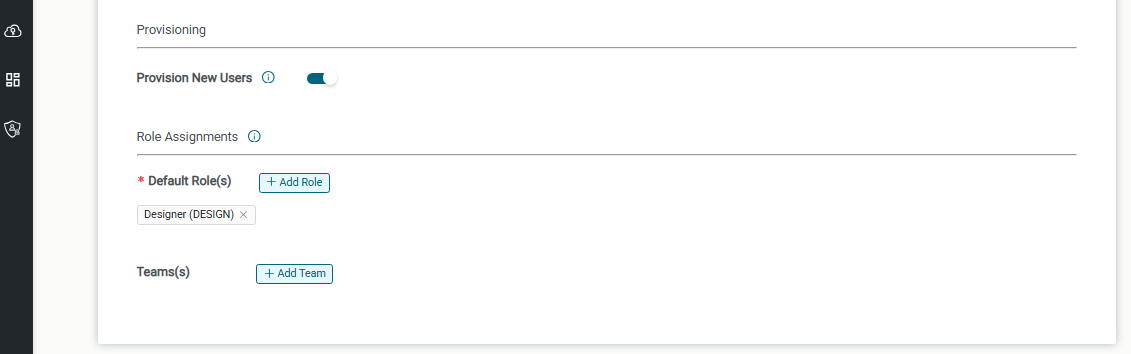
- Click Save
- Note that in the example above new users are set to Designer role for DESIGN mode only and new users are not assigned to any teams
- Note that if you choose not to enable
Provision New Users, then the user will need to be added manually (without SSO) and with whatever role you choose. The user will receive an automated email with login information. Once the user has created their Axway account and has logged in, then they can use their AWS IAM Identity Center account from then on.
Test the SSO Integration
Let's test the SSO Integration by creating a person in AWS AIM Identity Center and assigning them to the SAML app and try to sign into Amplify Fusion using SSO.
Sign on to Amplify Integration using SSO
Now we can test the SSO option for sign up in Amplify Fusion
- Sign out from AWS AIM Identity Center and Amplify Fusion
- Click on the Logon SSO button in Amplify Fusion
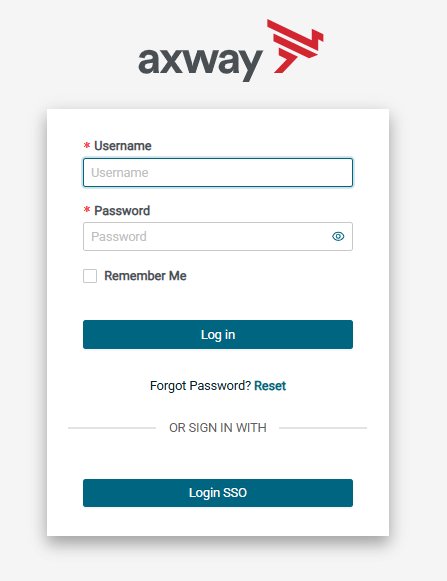
- You will be presented with the AWS AIM Identity Center login form and enter your credentials
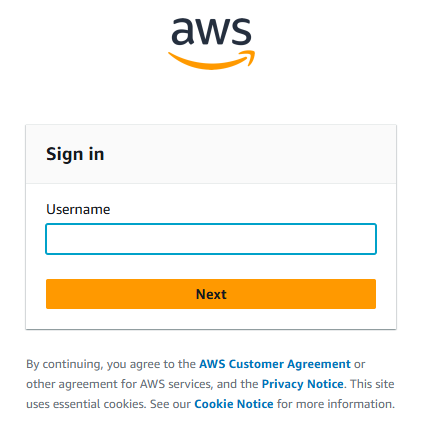
- Enter credentials for AWS AIM Identity Center including MFA code

- You will now be logged into Amplify Fusion in the new account

- Sign out and sign back into the administrator to view the new user in the Manager module.
.png)
If you got this far then SSO integration is configured properly and working!
Users and groups in AWS IAM Identity Center can be given access to the Fusion SSO App enabling them to sign into Amplify Fusion using their AWS IAM Identity Center credentials.