KB Article #180607
SYNCPLICITY: How to install and configure the Syncplicity Connector for Secure Transport
This article will provide details about the deployment, setup and usage of the Syncplicity Connector for Secure Transport.
Table of contents
- Introduction
- Installation
- Setup
- Test the setup
- File upload with sharing options
- Troubleshooting Steps
Introduction
Syncplicity Connector is a pluggable Transfer Site (TS) for Secure Transport (ST) which allows to connect the latter with the Syncplicity services and perform Server Initiated Transfers (SIT) by pulling or pushing files from or to Syncplicity accounts from a Syncplicity Tenant.
Installation
Download
The Syncplicity Connector for ST can be downloaded from the Axway Marketplace from this link.
Prerequisites
Before proceeding further, check the Prerequisites section of the README.md file, which is available in the Syncplicity Connector zip archive.
Remove previous deployments (if any)
Make sure that there are no files/folders from previous versions of the Syncplicity Connector. For that purpose, check the <FILEDRIVEHOME>/plugins/transferSites/ folder, and remove everything related to Syncplicity from it.
Unzip the package
Extract the zip archive with the Syncplicity Connector axway-securetransport-plugins-site-syncplicity-<version>.zip into <FILEDRIVEHOME>/plugins/transferSites/.
Add a logger
You need to add a dedicated Transaction Manager (TM) logger for the newly deployed Syncplicity Connector, so that events related to the Connector are available in the Server Log. Follow the steps below.
Take a backup copy of the <FILEDRIVEHOME>/conf/tm-log4j.xml file;
Open the <FILEDRIVEHOME>/conf/tm-log4j.xml file for editing;
Add the following logger in the beginning of the loggers section of the file, with the desired logging level:
<logger name="com.axway.st.plugins.site.syncplicity" additivity="false">
        <level value="info" />
        <appender-ref ref="ServerLog" />
</logger>
To enable debug logging, set the level value to debug. However, change the value with caution. It is recommended to switch to levels different than INFO only temporarily, e.g. during troubleshooting sessions.
Save the file
Restart ST's services
<FILEDRIVEHOME>/bin/stop_all
<FILEDRIVEHOME>/bin/start_all
Verify the installation
The installation can be verified in two ways:
Server Log
Go to the Admin UI → Operations → Server Log and filter by the ADMIN Component. Expand the Advanced Search options and put "Plugin Loaded" in the Message field. Scan the results for securetransport-plugins-site-syncplicity.
Transfer Site
Open an ST user account and create a new Transfer Site under Admin UI → Accounts → [user] → Transfer Sites → Add New. The Transfer Protocol dropdown should contain "Syncplicity".
Setup
Syncplicity side
Obtain keys
Application Key (Client ID)
- Go to Syncplicity Developer Portal (here or here).
- Login to your sandbox account or your Syncplicity Global Admin account. Create a new application. Open the newly created application.
- The Client ID is available in the first column. Copy it aside.
Application Secret
- Click on Actions → View secret. Copy the key aside.
Application Token
- Login to the Syncplicity Global Admin account here.
- Navigate to Account → Account → Profile section → Application Token. If it exists copy it aside. You can use the Renew option to regenerate an existing token. In case no token is presented, generate a new one and copy it aside.
Set API access privileges
While logged in with the Syncplicity Global Admin account in the Syncplicity Admin panel:
- Click on Admin → User Accounts and create a new Global Admin account, e.g. Global Admin, by using the Add a User button.
- Once created, click on it, then click on Impersonate user from the Tasks pane on the right.
- Navigate to Admin → User Accounts and open the first Global Admin account (from which the Application Token was copied). Then go to the Privileges section, click on Modify

and select Access content on behalf of managed users through API.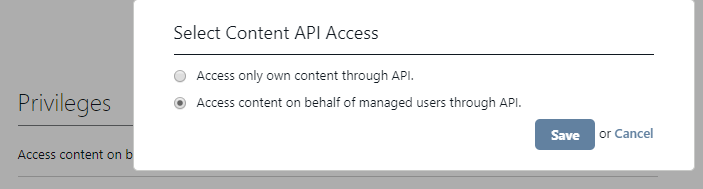
With this the Syncplicity side should be ready to allow transfers.
SecureTransport Side
Create a Transfer Site under a user and select "Syncplicity" from the Protocol drop-down. Use the tooltips in the Syncplicity Transfer Site for more information about a particular field or option. The below section describes those options and fields, which are required and/or their tooltips don't offer sufficient details.
Important: The Syncplicity Connector is 100% case sensitive. Keep this in mind when fields are filled, especially User email: field.
Site Name: Define a name of the Syncplicity Site.
Access Level – It is recommended to use "Public" if yu are going to use the Site in an Advanced Router (AR) Subscriptions at some point.
Connection Settings: For Application Key, Application Secret and Application Token use the keys from the Syncplicity section of this article.
Network Zone: the according proxy for uploads/downloads.
Verify certificate: select if the connection needs to be secured by checking the server certificate on the other end (Syncplicity).
Important: Make sure traffic from/to the following hostnames on port 443 is allowed on the local network firewall:
gol.syncplicity.com
api.syncplicity.com
api.eu.syncplicity.com
*.amazonaws.com
The cloud storage endpoints below should also be allowed (port 443) for deployments that use cloud storage. For on-premises storage, the corresponding on-premises storage endpoint URLs should be accessible.
data.syncplicity.com
data-eu.syncplicity.com
data-eu.eu.syncplicity.com
data-us.eu.syncplicity.com
Test the setup
Server Initiated Pull by ST from Syncplicity
- Create a Subscription to a Basic Application (BA).
- in the For Files Received from this Account or its Partners section, select "Automatically retrieve files from" and select the Syncplicity Transfer Site from the drop-down.
- Set a schedule or alternatively, use the Retrieve Files Now button after the Subscription was saved (i.e. save the Subscription, re-open it and then use the button).
- [optional] Under For Files Sent to this Account or its Partners, select "Send Files Directly To" and select a different Site where the test file should be sent to (local or remote location) after it's pulled from Syncplicity.
- Save the Subscription.
- Place a test file in Syncplicity in the folder that was defined under "Download Settings" of the Syncplicity Site in ST.
- Wait for the scheduler to trigger or use the "Retrieve Files Now" button in the Subscription.
- Go to Operations → File Tracking → Show Advanced Search, then filter by "Protocol: Syncplicity" and make sure each of the transfers succeeded with green check Transfer Status icon.
Server Initiated Push from ST to Syncplicity
- Create another Subscription to a Basic Application (BA).
- Under For Files Sent to this Account or its Partners, select "Send Files Directly To" and select the Syncplicity Transfer Site.
- Login to ST with the user account and upload a test file in the Subscription Folder. Wait for a few seconds.
- Go to Operations → File Tracking → Show Advanced Search, then filter by "Protocol: Syncplicity" and make sure each of the transfers succeeded with green check Transfer Status icon.
- If all have succeeded, go to Syncplicity and check the folder defined under "Upload Settings" of the Syncplicity Site in ST.
- The file should be there, as well as on all devices connected to the Syncplicity account.
File upload with sharing options
The Syncplicity Transfer Site allows sharing of a link to a folder or a file under the Post Transmission Actions -> Send Options section.
Sharing a folder or a file link gives the ability to share the resource with Syncplicity User/s or Syncplicity Groups having Read or Read/Write permissions in Syncplicity. Emails/groups can be defined either statically, or by using Expression Language (EL) functions. The EL functions are used in conjunction with an appropriate ST Advanced Routing (AR) setup. For example, the User emails or Groups can be extracted from predefined AR Subscription flow attributes.
Note: You can also use EL functions when defining the value of the "User email" required field in the Syncplicity Transfer Site.
For more information refer to Secure Transport Administrator’s Guide, chapter "Advanced Routing", and also the section "Custom Expression Language functions and variables" under the same chapter.
Troubleshooting
When a transfer to Syncplicity has failed, the steps below can be used as guidelines how to troubleshoot the issue. Yet, as a first step, you should always verify that the Application Key, Application Secret and Application Token in the Syncplicity Transfer Site are correct and up to date.
- Go to ST's Admin UI → Operations → File Tracking, expand the "Show Advanced Search" and filter by File, or by Protocol: Syncplicity, etc.
- Click on the red X Transfer Status icon related to the failed transfer, expand the window and take a screenshot of the entire content. The screenshot will be requested by Axway Support in case it is needed to open a Support ticket.
- Check the HTTP response code under Protocol Commands in the transfer details pop-up. The error may provide directions to the root cause.
- Click on the SessionID link, which redirects to the Server Log with filtered results related to the transfer session.
- Add an additional filter for ERROR log level and hit Go.
- Inspect the message starting with
[TRANSFER_SITE]:[syncplicity]. - The detailed error/root cause is likely to be presented in these event messages. Click on the timestamp link next to the message that has the HTTP response error code. Expand the window. Detailed error message/stack trace is presented.
In case the error does not provide an explanation what had happened, take a screenshot of the window mentioned in the last bullet point and/or export the log results using the "Export Log" button and open a ticket with Axway Support for further investigation. In case the Transaction Manager (TM) log is exported in flat file, send an archived copy of the TM log to Axway Support, along with the timeframe/timestamp details of the failed transfer.